|
<< Click to Display Table of Contents >> How to Scan a Document |
  
|
|
<< Click to Display Table of Contents >> How to Scan a Document |
|
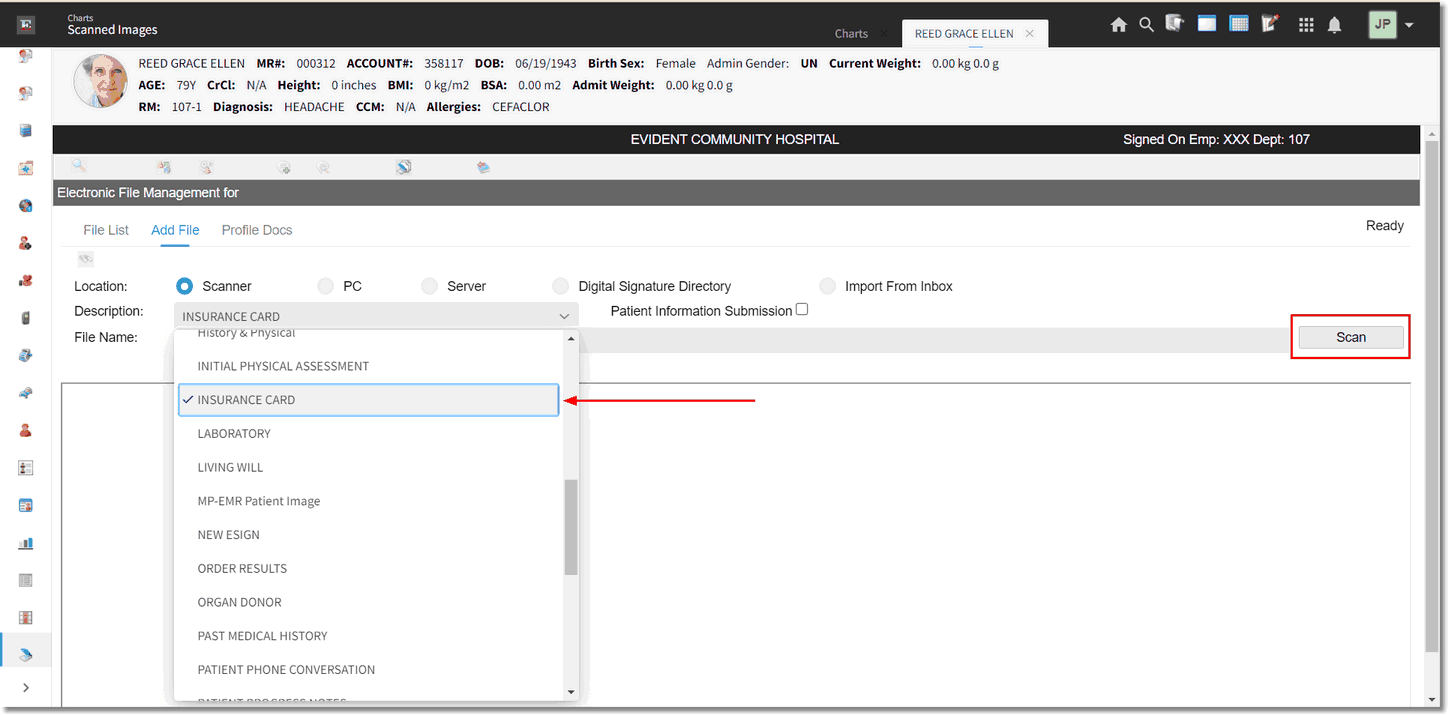
To begin scanning a document to a patient's account, select the Add File tab. Select the Scanner radio button and then select an Image Title of the document that is about to be scanned from the Description drop-down. Once an Image Title has been selected, the Scan option will become enabled. Select Scan to continue.
Select Web Client > Charts > Select Patient Account > Scanned Images > Add File
Electronic File Management
The Page Properties of cpscan will then display. Select the appropriate properties for scanning the document. Once the Page Properties are set accordingly, select OK to continue.
NOTE: The resolution, color depth and size of the document to be scanned may be defaulted in the Image Titles table.
The document will then display on the screen once it has been scanned. There are additional options on the tool bar.
•![]() : The scanner icon may be used to scan the other side of the document, if needed.
: The scanner icon may be used to scan the other side of the document, if needed.
•![]() : The save icon is used once all scanning has been completed.
: The save icon is used once all scanning has been completed.
•![]() : The left and right arrow icons will allow each scanned image to be viewed.
: The left and right arrow icons will allow each scanned image to be viewed.
•![]() : The rotate icon will allow the scanned image to be rotated, so that it is readable, before saving.
: The rotate icon will allow the scanned image to be rotated, so that it is readable, before saving.
•![]() : The delete icon will allow a scanned image to be deleted, if needed.
: The delete icon will allow a scanned image to be deleted, if needed.
Once the document has been scanned in correctly, select the Save icon to exit cpscan.
NOTE: If the document is exited without selecting the Save icon, a prompt will display asking if you want to save the document.
The "Enter alternate title" prompt will only display if the Alternate Title Prompt field has been selected in the Image Titles table, for the selected image title that was just scanned. A new title may be entered, but is not required. If a new title is needed, populate the new title in the field provided and select OK to continue. The new title will display on the File List tab with an asterisk "*" in front of it.
NOTE: If a new title is not needed, select OK to continue.
The "Enter Document Date" prompt may then display if the Enter Document Date field in the Image Titles table has been selected, for the selected image title that was just scanned. The date will default to the current date, but may be changed if needed. Select OK to continue.
At this point, the document has been added to the patient's account and will be listed on the File List tab.