|
<< Click to Display Table of Contents >> AP Vendor Maintenance Page 1 |
  
|
|
<< Click to Display Table of Contents >> AP Vendor Maintenance Page 1 |
|
Select Web Client > System Menu > Accounts Payable > Vendors
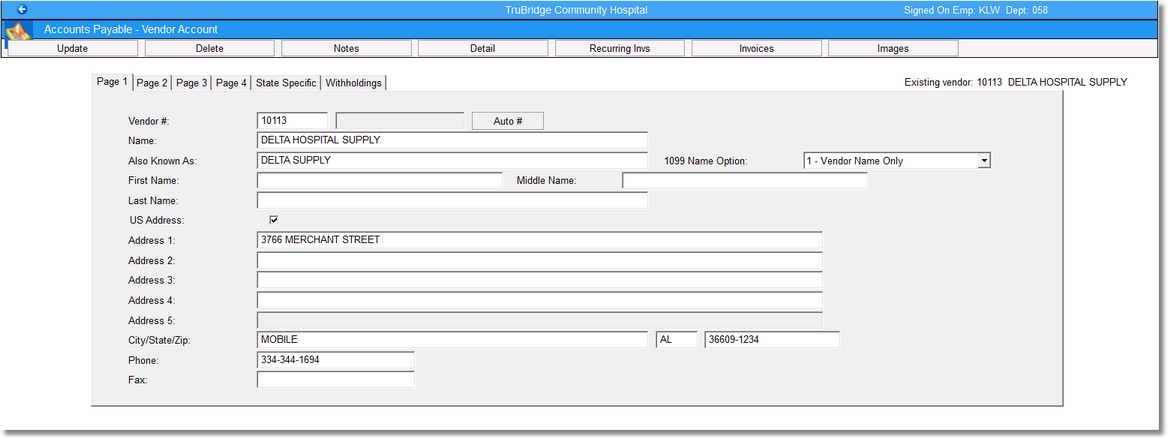
Accounts Payable - Vendor Account, Page 1
•Vendor Number: Each vendor must have a vendor number assigned. This number may consist of five characters and may be an alpha or numeric combination. Most of the printed reports will print in vendor number sequence; therefore, it is usually more practical to use numeric characters only, skipping ten or more numbers between vendors. This allows for entering vendors in an alphabetic sequence by number.
•Name: Enter the vendor’s name using up to 30 characters of information.
•Also Known As: Enter an alternate name for the vendor using up to 30 characters of information. This name will be available in an alternate lookup method in Vendors under the View section and Invoice Entry screen accessed through New Invoices as well as any place there is a vendor lookup option.
•1099 Name Option: Designates which name will print to the Name box on the 1099. The following options are available:
1 - Vendor Name Only: Will print the Vendor Name on page 1 of the Vendor Master to the Name box on the 1099.
2 - AKA Name Only: Will print the Also Known As Name on page 1 of the Vendor Master to the Name box on the 1099.
3 - Vendor Name First: Will print both the Vendor Name and the Also Known As Name to the Name box on the 1099, but the Vendor Name will display first.
4 - AKA Name First: Will print both the Also Known As Name and the Vendor Name to the Name box on the 1099, but the Also Known As Name will display first.
•First Name/Middle Name/Last Name: Enter the 1099 recipient's first, middle and last names. These fields only need to be completed if a 1099 is being sent to a person and not a business.
•US Address: This field defaults as selected. If this field is not selected the system will display five free-form text lines for a foreign address and the City/State/Zip field will not be available. Both U.S. and foreign address may be entered for a vendor. The status of this option determines which address will print on the check.
•Address 1-5: Enter the vendor’s street addresses using up to 30 characters of information. Fields following the first address field may be left blank as necessary.
•City/State/Zip: Enter the vendor’s city. The city field may contain up to 15 characters. Enter the two-character state code required by the U.S. Post Office. Enter the zip code required by the post office. The zip code should be five or nine digits.
•Phone: Enter the vendor’s telephone number. The complete numbers, including area code, should be entered without dashes.
•Fax number: Enter the vendor’s fax number. The complete numbers, including area code, should be entered without dashes.