|
<< Click to Display Table of Contents >> Posting The Refund Charges to the Patients Accounts |
  
|
|
<< Click to Display Table of Contents >> Posting The Refund Charges to the Patients Accounts |
|
Patient Refunds must still be posted to their respective accounts in Patient Accounting after printing the refund checks and running the Transaction Edit List. When the Transaction Edit List is printed and moved to permanent files, the system posts entries to the various General Ledger accounts involved, using the Check Date as the Transaction Date. The Refund system also creates a series of entries in the Charge Review & Correct screen in Patient Accounting for each check that was a refund to a patient account.
Select Web Client > System Menu > Patient Accounting > Master Selection > Patient Charging > Charge Review
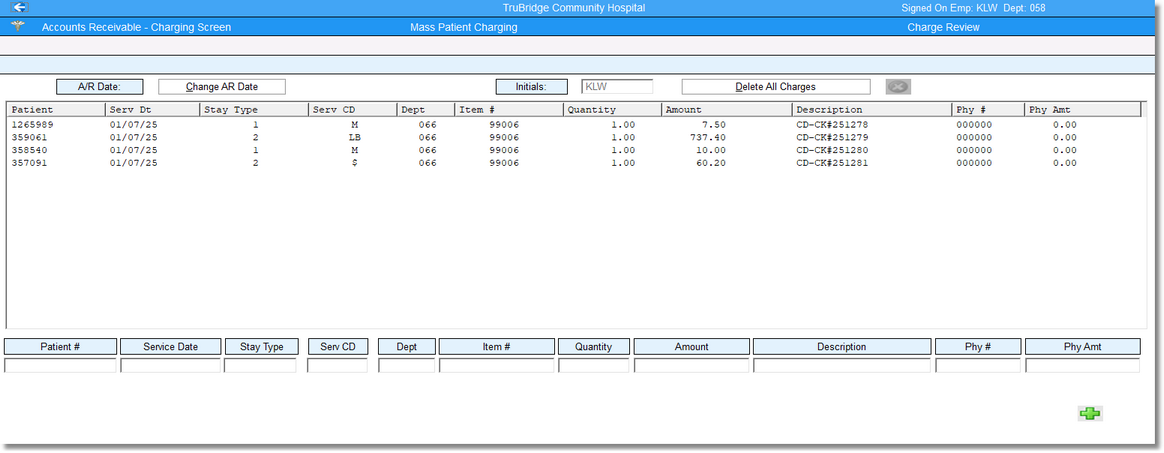
Accounts Receivable - Charging Screen
These charges must now be posted within Patient Charging. This must be done from the same terminal or PC used to print checks. From the Hospital Base Menu, select Master Selection > Patient Charging > Charge Posting. Selecting YES will post the refund charges, and the patient accounts will reflect the refund and reduce the credit balance on the accounts.
Setting up a Charge Item for Refund Checks
In order for the patient refund checks to post to the patient accounts properly, a charge item must be setup in the Item Master. The Item Master is usually set up using the following perimeters:
The item number, typically 99006, should be in the range of Administrative item numbers.
The description of the item should be Patient Refund.
The Insurance Summary Code is “RF” and must also be set up in the Summary Charge Code Table (in the Business Office Tables).
A General Ledger number for a “wash” account is used and should be loaded in the refund charge item on page 3. This is necessary since there are two separate entries made to the General Ledger: The first entry is made when checks are printed. This creates a debit to the “wash” account and a credit to the cash account. The second entry is made when charges are posted to the patient’s account, which creates a debit to Accounts Receivable and a credit to the “wash” account. The charge item number created will need to be loaded in Accounts Payable Control Options under the General tab.
Select Web Client > Tables > Control Tables > Item Master > Item # > Page 1
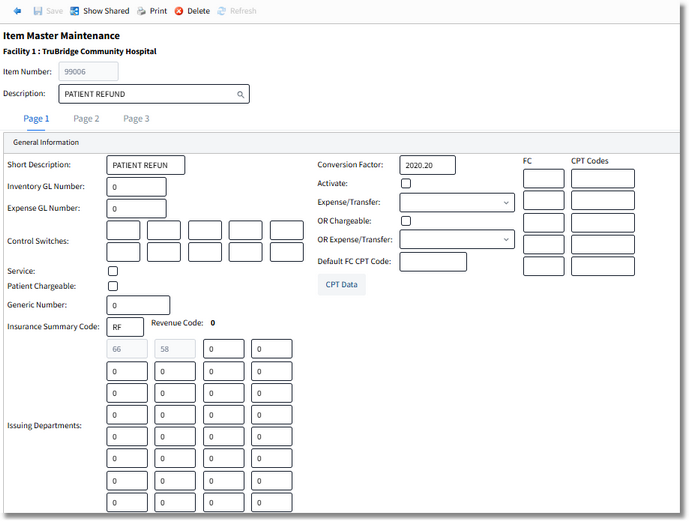
Item Master Maintenance, Page 1