|
<< Click to Display Table of Contents >> Clinical History Functionality |
  
|
|
<< Click to Display Table of Contents >> Clinical History Functionality |
|
To access Clinical History, select Charts > Select Patient > Clinical History.
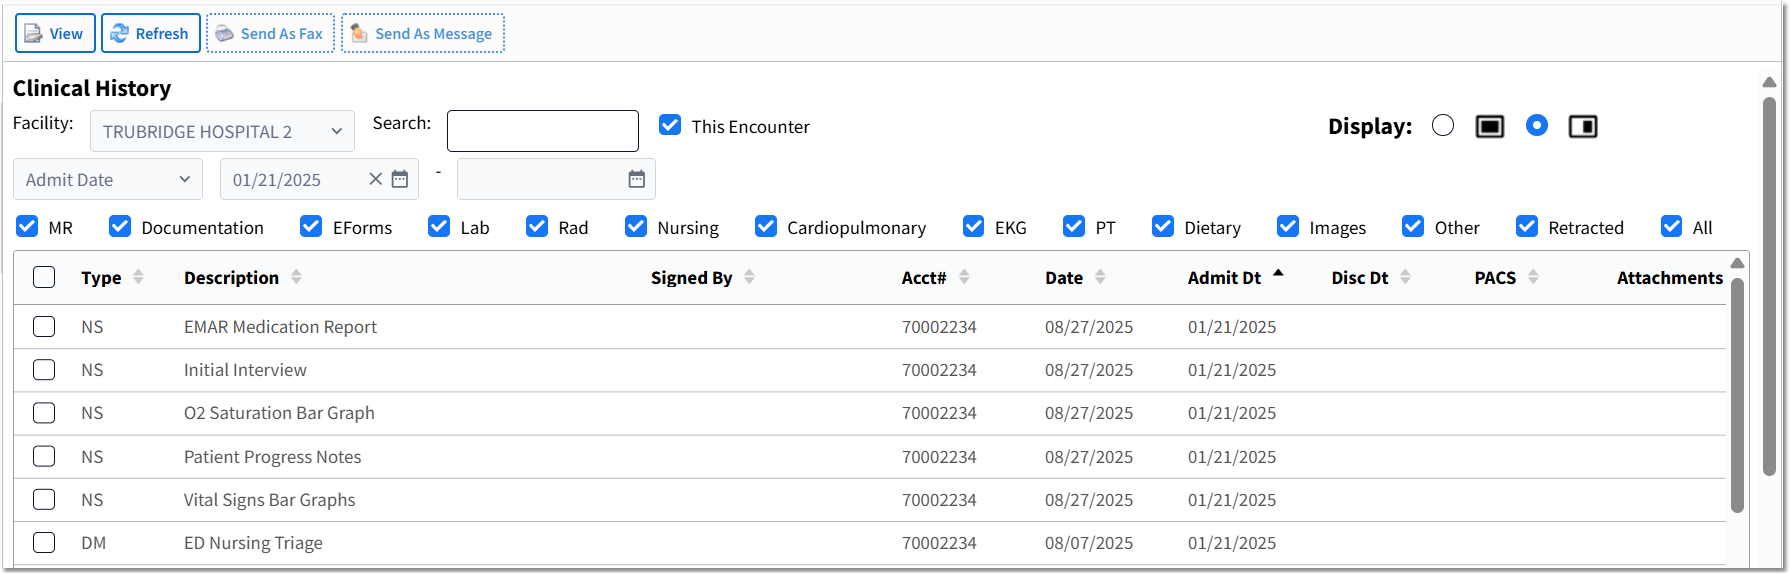
Clinical History
Clinical History displays documents for all encounters on a patient. By default, the display is sorted by Date in reverse chronological order.
•View or Result/TXN: Select the document(s) in the display and select View or Result/TXN to view the document(s) in a full screen. Result/TXN displays if the document is a transcription.
•Refresh: Select to refresh the document display.
The following options are available if your facility has purchased the Communication Center application:
•Send As Fax: Select the document(s) in the display and select Send As Fax to fax the documents.
•Send As Message: Select the document(s) in the display and select Send As Message to send the documents in a message.
•Type: Document type.
•Description: Document description.
•Signed By: Name of the person who signed the document and the date/time the document was signed.
•Acct #: The account number the document was created under.
•Date: Document date.
NOTE: For scanned images, if the document date is manually entered when scanning/uploading, the date entered will display in the Date column. To view the scanned date, hover over the date in the Date column.
•Admit Dt: The account admission date.
•Disc Dt: The account discharge date.
•PACS (Picture Archiving and Communication System): VIEW displays in the column when an image is available. To view the image, select the entry and select PACS on the Action Bar.
•Attachments: VIEW displays in the column when an attachment is available. To view the attachment, select the entry and select Attachment on the Action Bar.
NOTE: Users can adjust the column widths and rearrange the order of the columns by dragging and dropping the columns. These column selections are "sticky," meaning they will remain on the user's last selection until changed again.
•The Facility drop-down displays a list of facilities that share profiles with the facility associated with the selected patient. If the facility does not share profiles, nothing will display in the drop-down. Select the desired facility from the drop-down to display documentation from that facility.
•The Search field allows the display to be filtered based on the entry in the Search field. Users can search by account number, document type, document description, or the provider who signed the document.
•Selecting the This Encounter check box displays only documents for the patient encounter. When selected, the Facility and Date fields become disabled.
•Select Admit Date or Document Date from the drop-down to filter the display by date. Enter a beginning date (optional) and an end date (optional) in the date fields. If no dates are entered, all documents will display.
•Documents in the following categories may be included (select the check box) or excluded (deselect the check box) in the display:
oMR: Medical Records transcription.
oDocumentation: Documentation from EDIS, TruBridge Provider EHR, Physician Documentation, and Notes..
oEForms: Electronic Forms documentation.
oLab: Laboratory and Pathology results.
oRad: Radiology transcription.
oNursing: Nursing documentation defined in Tables > Clinical > Nursing category > POC Control Maintenance (Page 2) > Report Codes to Send to Optical Disk.
oCardiopulmonary: Cardiopulmonary or Respiratory Therapy transcription.
oEKG: EKG reports.
oPT: Physical Therapy, Speech Therapy, and Occupational Therapy reports.
oDietary: Dietary reports.
oImages: Scanned images defined to display in Clinical History. This setup is in Tables > Business Office > Images category > Title. Scanned images set to copy forward will only display once, and deleted images will not display in Clinical History.
oOther: Special Procedures, Sleep Lab, and Cardiac Rehab documents.
oRetracted: Documents or signed/completed reports retracted in the Documentation application.
oAll: All documentation and reports listed above.
The filter selections are "sticky," meaning they will remain on the user's last selection until changed again.
NOTE: If your facility has purchased the Communication Center application, documents saved from the Communication Center to a patient's profile will display in Clinical History. Documents labeled as a "Secure Document (code SD)" will be excluded from Clinical History. Currently, Communication Center documents will display regardless of the selections made within the check box filter.
The Display field allows a user to set the default viewing behavior when double-clicking on a document in the list.
•Select the Full Screen (![]() ) radio button to display documents in a full screen.
) radio button to display documents in a full screen.
•Select the Split Screen (![]() ) radio button to display documents in a split screen, with the selected document on the right and the list of documents remaining visible on the left. (NOTE: This selection applies only when double-clicking a document in the list. Selecting the document and then selecting the View button will display the document in full screen, regardless of the Display option selected.)
) radio button to display documents in a split screen, with the selected document on the right and the list of documents remaining visible on the left. (NOTE: This selection applies only when double-clicking a document in the list. Selecting the document and then selecting the View button will display the document in full screen, regardless of the Display option selected.)
The Display selection is "sticky," meaning it will remain on the user's last selection until changed again.
If Full Screen is selected as the default display view, double-clicking on a document will display the document in a full screen.
Document Viewer - Full Screen
In full screen view, the following Action Bar buttons are available.
•Exit: Select to return to the previous screen.
•Export: Select to export the document.
•Note: Select to create and send an internal message via the Communications application.
The following options are available if your facility has purchased the Communication Center application:
•Send As Fax: Select to send a fax.
•Send As Message: Select to send a message.
If the Split Screen is selected as the default display view, double-clicking on a document will display the document in a split screen, with the Document Viewer on the right and the document list remaining visible on the left. To close the Document Viewer, select the right-pointing arrow at the top of the Document Viewer pane.
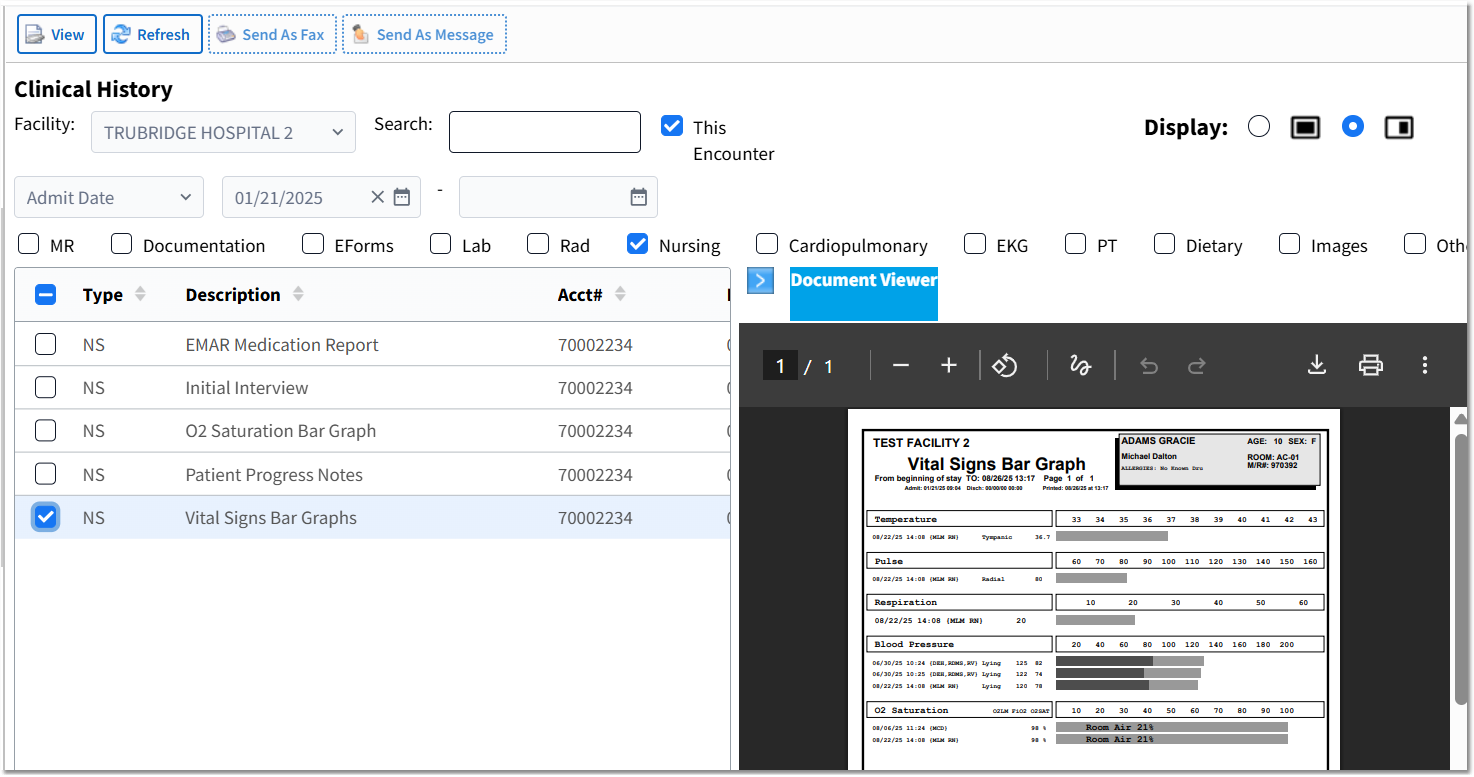
Document Viewer - Split Screen
In split screen view, the following Action Bar buttons are available.
•View or Result/TXN: Select to display the document in a full screen. Result/TXN displays if the document is a transcription.
•Refresh: Select to refresh the screen.
The following options are available if your facility has purchased the Communication Center application:
•Send As Fax: Select to send a fax.
•Send As Message: Select to send a message.