|
<< Click to Display Table of Contents >> Contacts |
  
|
|
<< Click to Display Table of Contents >> Contacts |
|
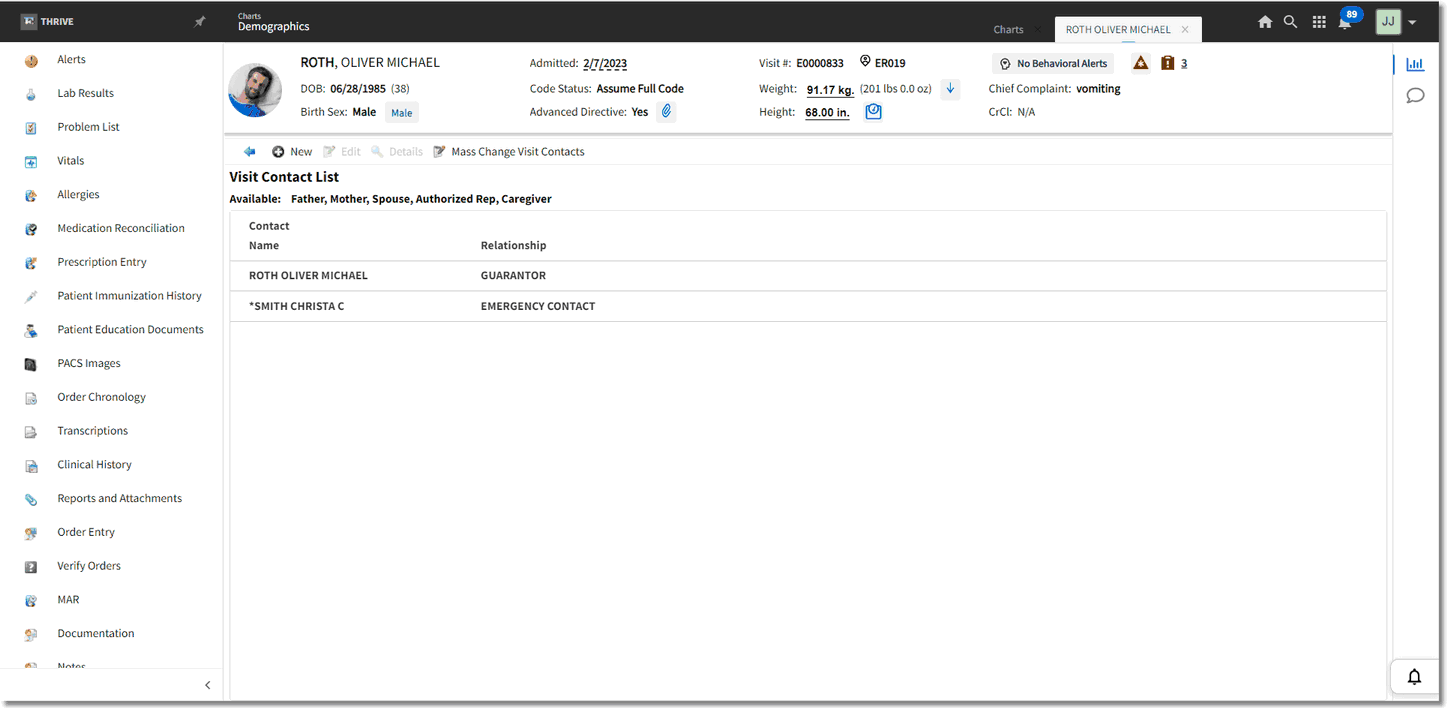
Selecting Contacts from the action bar will display the Visit Contact List and will show all the contacts for the patient along with the relationship type. From this screen, existing contacts may be edited and new contacts may be added.
A list of available contact types, with no associated contact name, will be listed at the top of the screen. The available contact types are: Guarantor, Father, Mother, Spouse, Emergency Contact, Authorized Rep and Caregiver. Once a contact name is associated with an available contact type, it will copy back to the profile or visit, depending on if it is being added from the Profile Contact List or the Visit Contact List. As contact names are associated with available contact types, they will be removed from the Available listing at the top of the screen.
Contacts with an asterisk "*" at the beginning of their name denotes that the contact is the Primary Emergency Contact for the patient.
Only one contact name may be added for contact types Guarantor, Father, Mother, Spouse, Authorized Rep and Caregiver. Multiple contact names may be added for Emergency Contacts.
NOTE: The Guarantor should never be added from the Profile/Visit Contact List. This should still be added on the profile or visit itself.
Select Web Client > Charts > Select Patient > Demographics > Personal > Contacts
Visit Contact List
To add a new contact, select New from the action bar.
Select Web Client > Charts > Select Patient > Demographics > Personal > Contacts > New
Patient Profile List
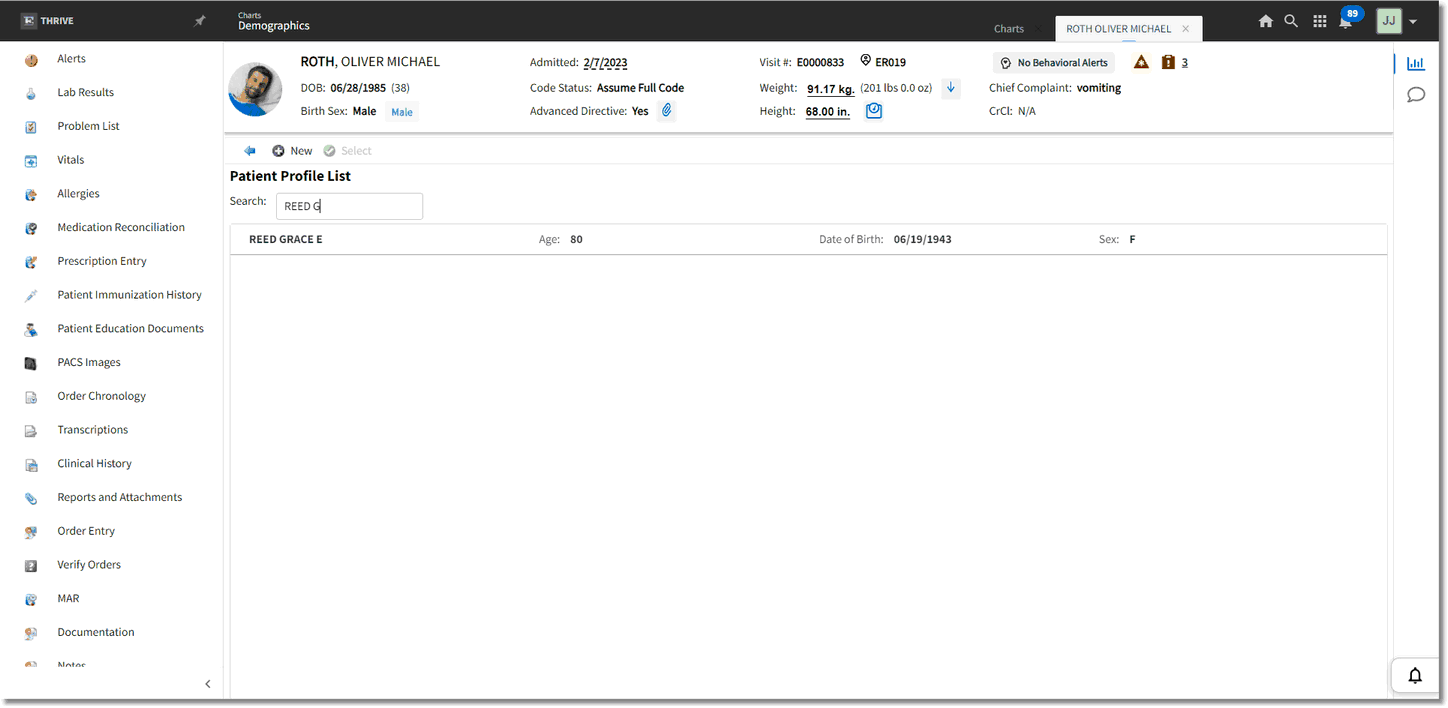
The Patient Profile List will then display. A search option is available to search for an existing patient to add as a contact. Once the contact has been found, double-click the contact name, or select the contact name and then select Select from the action bar. If the contact person is not found, select New from the action bar to create a patient profile for the contact.
Select Web Client > Charts > Select Patient > Demographics > Personal > Contacts > New > Select Contact
Demographic Information
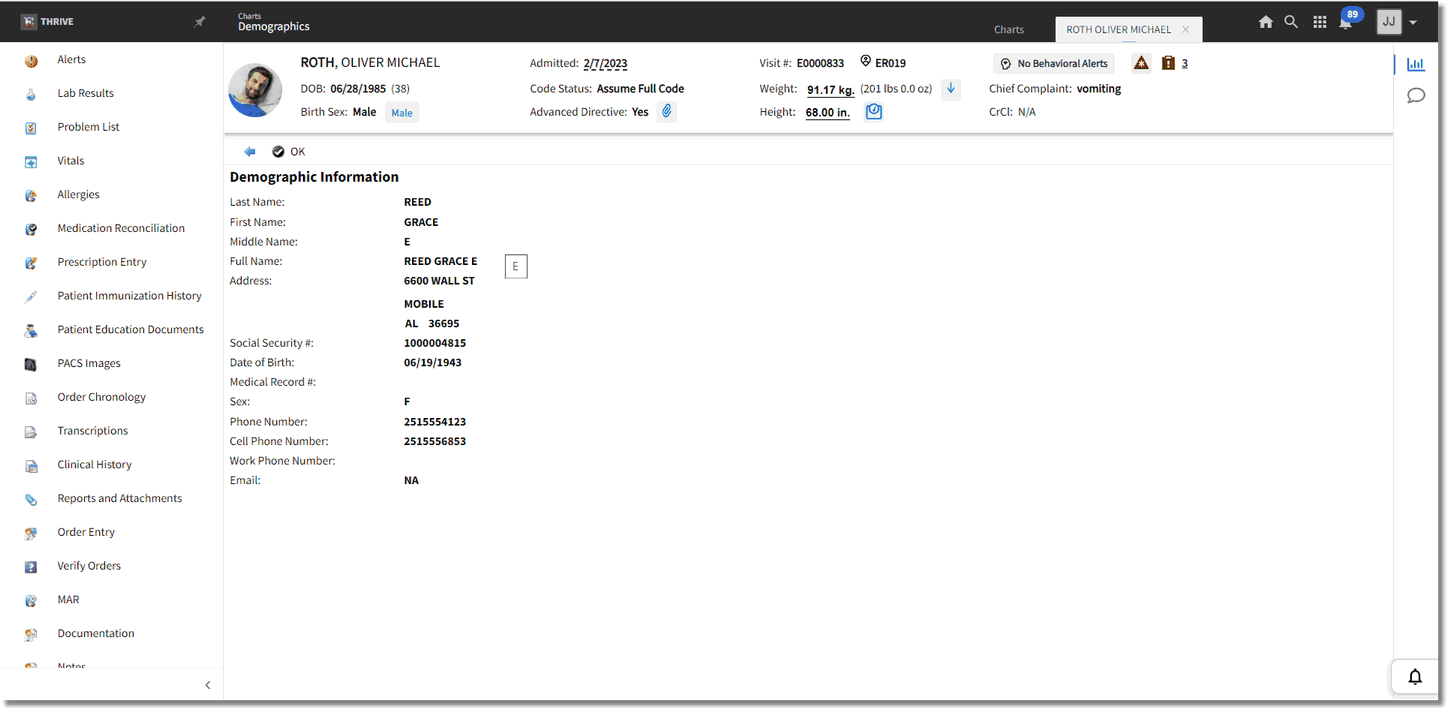
The Demographic Information screen will then display to verify the information for the selected contact is correct. If the correct contact has been selected, select OK from the action bar. If the wrong contact was selected, select the back arrow to return to the Patient Profile List.
Select Web Client > Charts > Select Patient > Demographics > Personal > Contacts > New > Select Contact > OK
Relationship Selection
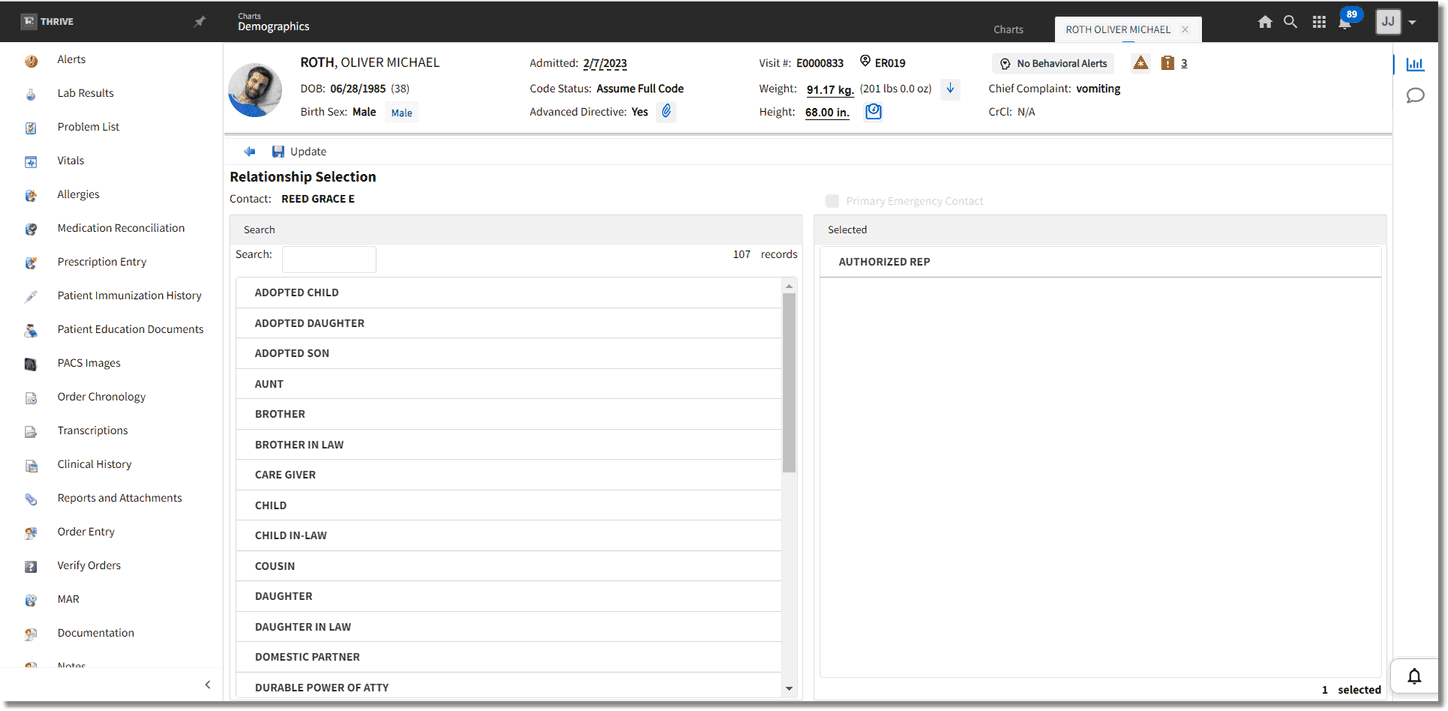
The Relationship Selection screen will then display. On the Search side of the screen, double-click the contact's relationship to the patient to add it to the Selected side of the screen. Multiple relationships may be added for the contact. If a relationship needs to be removed, double-click the relationship on the Selected side of the screen.
The Primary Emergency Contact option at the top of the screen will only become accessible if the Emergency Contact relationship is selected.Once all relationships have been selected, select Update on the action bar. To return to the Visit Contact List, select the back arrow.
NOTE: There can only be one contact designated as the Primary Emergency Contact. If another contact was previously designated, as soon as this option is selected and updated for the new contact, it will be reflected in both the Profile/Visit Contact List with an asterisk at the beginning of the contact name and will update the profile or visit.
The following options are available on the action bar of the Visit Contact List.
•New: Select this option to add/create a new contact.
•Edit: Select this option to make changes to the contact's relationship.
NOTE: If needing to delete a contact entirely, select the contact, then select Edit. Remove all relationships from the Selected side of the screen by double-clicking each one. Once finished, select Update and then select the back arrow to return to the Visit Contact List.
•Details: Select this option to view the Demographic Information for the selected contact.
•Mass Change Visit Contacts: Select this option to allow contacts to be changed on all visits associated with the profile.
Select Web Client > Charts > Select Patient > Demographics > Personal > Contacts > Mass Change Visit Contacts
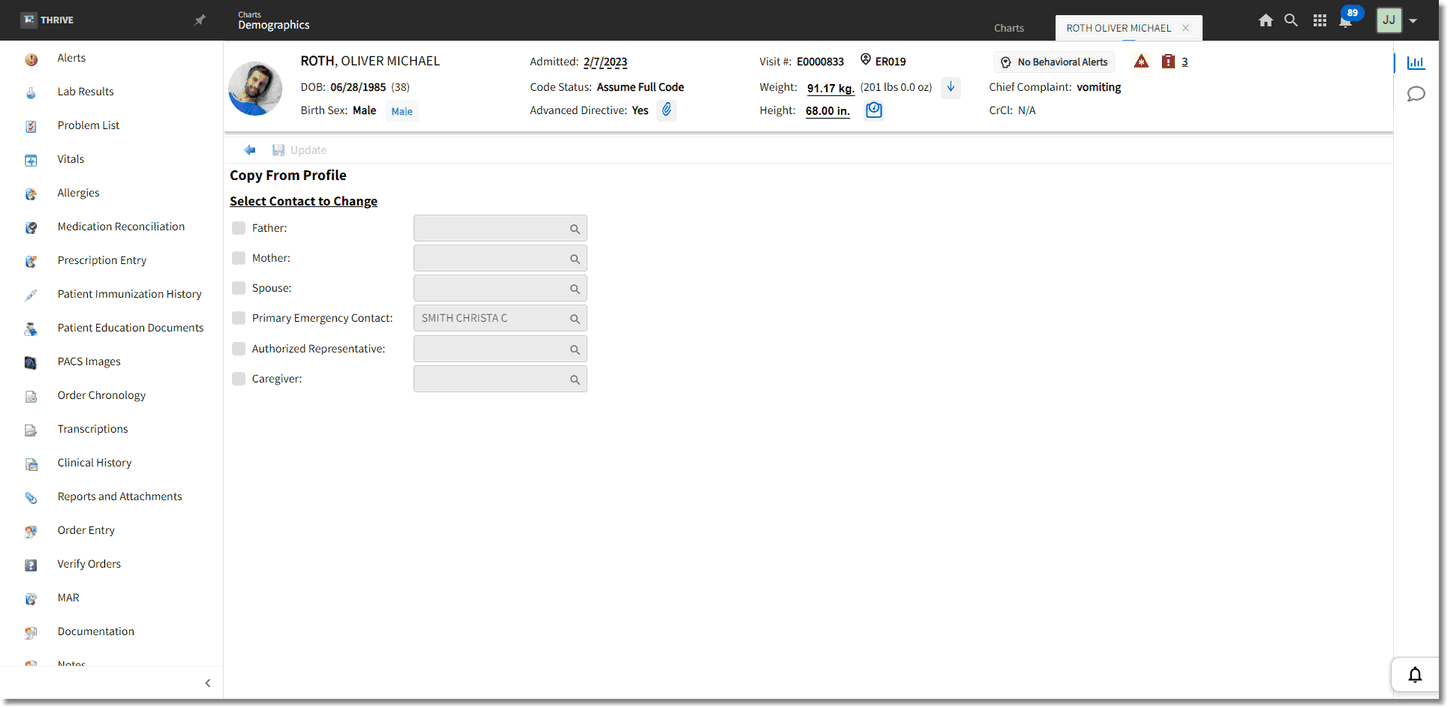 ass Change Visit Contacts
Once the Copy From Profile screen displays, the contacts may be copied from the profile to the account. Once all selections have been made, select Update on the action bar.
To return to the Personal screen, select the back arrow.