|
<< Click to Display Table of Contents >> Security Audit Log |
  
|
|
<< Click to Display Table of Contents >> Security Audit Log |
|
The Security Audit Log is a useful tool when conducting Periodic Security Reviews and Security Investigations. It provides audit details for both PHI and non-PHI data and categorizes each event using actions such as: Query, Insert, Update, Delete, Print, and Copy. The Security Change Log may be accessed from the Security Audit Log for Insert, Update and Delete events, but only if the database table associated with the field that was changed has the audit level set to Change Level.
Select Web Client > System Administration > Security Audit Log
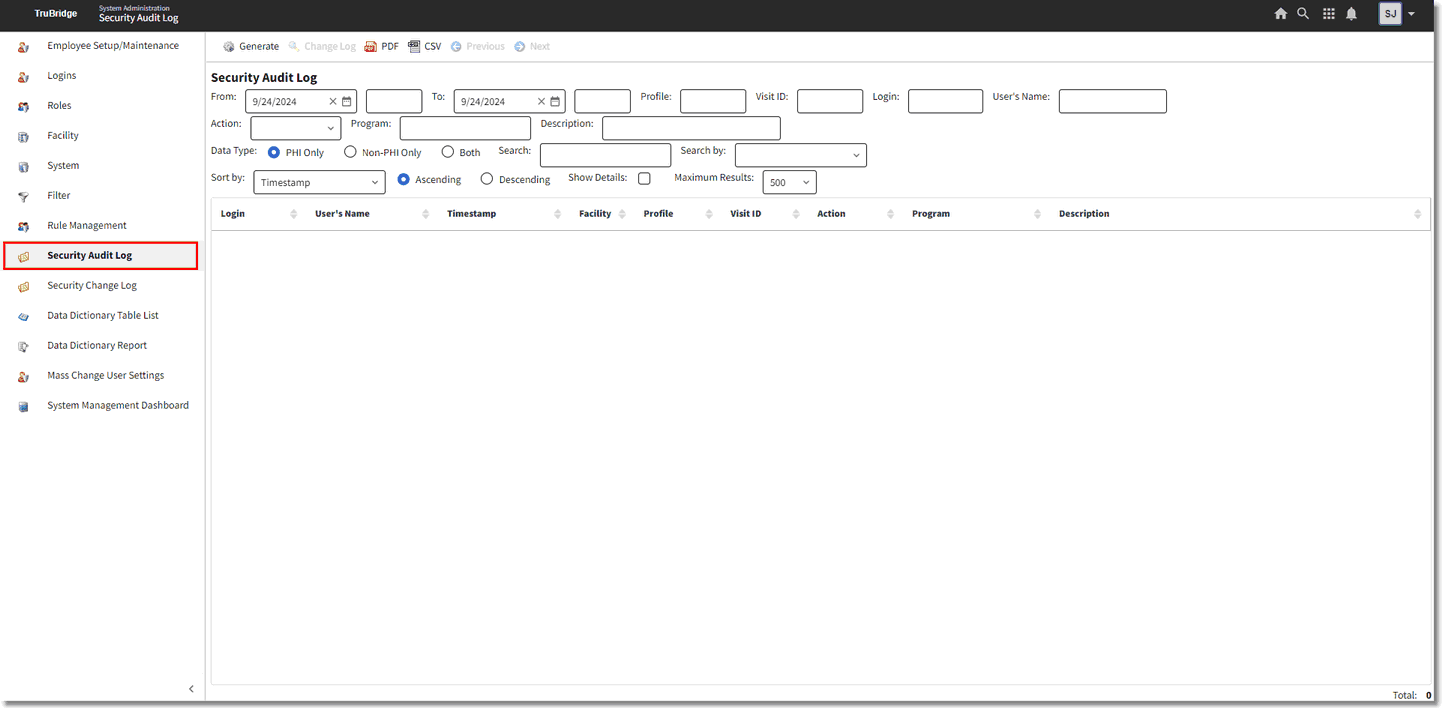
Security Audit Log
The information that displays in the audit log may be delimited using the following options:
•From/To: This is the date/time range to be audited.
•Profile: Enter a specific person profile number to be audited. When searching by person profile number, the results will display actions that occurred on the profile and all visits attached to the profile. The Person Profile Number is displayed in the upper right-hand corner of the profile. Leave this field blank to run for all profiles.
•Visit ID: Enter the patient account number to be audited. Leave this field blank for all visits.
•Login: Enter the employee or physician login to be audited. The ability to wildcard the login is available using an asterisk (*). For example, entering john* will find results for john, johna, johnb and john12. This makes it easier to audit users that have multiple logins.
•User's Name: Enter the employee or physician display name to be audited. This field uses contain logic, so searching by "beth" will find results for user's with display names like Bethany, Elizabeth, and Beth. Keep in mind that the user's display name may be a nickname.
•Action: Select an action to be audited from the drop-down list or leave blank for all actions.
•Program: Enter the program name (launcher name) to see audit data for that program name only. If this field is left blank, the report will run for all program names.
•Description: Enter the description of the table to be audited. Leave this field blank for all tables. This field uses contain logic, so searching by "profile" would produce results for table descriptions like Profile Ethnicity and Profile Races.
•Data Type: Select they type of data to display in the audit log, the options are PHI, Non-PHI, or Both.
•Search: The search field works with the Search By field. Select a category to Search By and then enter the corresponding search criteria in the Search field.
•Search By: This field is used to categorize the criteria entered in the search field.
•Sort By: Select a field to sort the audit data by from the drop-down menu.
•Ascending/Descending: Choose whether the data should be sorted in Ascending or Descending order.
•Show Details: Selecting this option will allow additional information to display with the audit data. For example, the Rule ID.
•Maximum Results: Select the maximum number of results that should display.
The following data is displayed with each audit entry.
•Login: Pulls the employee or physician login.
•User's Name: Pulls the employee or physician display name. If a user name cannot be pulled, the user's Login will display here instead.
•Timestamp: Pulls the date and time (hour, minute and seconds) that a transaction occurred.
•Facility: Pulls the Facility ID of the facility where the action occurred. The Facility ID is assigned in the Facility table.
•Profile: Pulls the Person Profile Number where the action occurred. The Person Profile Number is displayed in the upper right-hand corner of the profile.
•Visit ID: Pulls the Patient Account Number where the action occurred.
•Action: Pulls one of the following actions that occurred.
▪Query: A search by Patient Name was performed within Thrive. The Description displays the search criteria that was entered in the patient name lookup.
▪Access: An area of Thrive was viewed but not updated. .
▪Insert: A database transaction where a new record is created in a table.
▪Update: A database transaction where an existing record is modified in a database table..
▪Delete: A database transaction where an existing record is permanently deleted from the database table.
▪Print: An EHI element was printed or viewed in a PDF©.
▪Copy: A copy of an EHI element was exported for use outside the Thrive EHR.
▪FHIR Copy: A copy of an EHI element was exported for use outside the Thrive EHR thru API capabilities.
▪Auth Query: There was a successful attempt to acquire a Token given to a third party application to access PHI. The third party application is set up with credentials (login and password) to access PHI via the Patient Portal Login that is in the Login field on the Security Audit Log.
•Program: Pulls the program name or launcher name associated with the action.
•Description: For Insert, Update and Delete actions the description will display the database table that was affected by the action. For Query actions, the description will be the name that was entered in the patient name lookup. For Print and Copy actions, the description will be the name of the report or document that was accessed.
If Details was selected, the following information will also display.
•Argument: The Argument assists TruBridge Support in troubleshooting error messages and problems.
•ARID (Accounts Receivable ID): Pulls the Accounts Receivable ID number that is associated with the facility in the Facility table.
•SPID (Shared Profile ID): This number identifies the location of the record at the person profile level when person profiles are shared across facilities. This number is assigned to the facility in the Facility table.
•Rule ID: This is the Rule ID assigned to the rule in Identity Management that allows the user to perform the action.
•Rule Version: This is the revision number of the rule ID in question
•Virtual ID Process: The Virtual ID Process assists TruBridge Support in troubleshooting error messages and problems.
•Session ID: A unique identifier assigned to each user at the time of login and remains with the user until he/she logs out. The purpose of the Session ID is to make it easier to trace through an auditing scenario.
•Transaction ID: This is a unique identifier given to every transaction operation (insert, update, delete) executed at the database table level. Understand that some options such as a “Save or Edit or Update” option in the end user application can result in multiple transactions across several tables. This identifier ties all those transactions together to indicate all occurred via the same option.
The following options are available on the action bar.
•Generate: Select Generate after entering the audit parameter to display the data.
•Change Log: The Change Log may be selected for Insert, Update and Delete transaction if the table associated with the transaction is set to record at the Change Level.
•PDF: Select this option to display an Adobe© version of the audit data.
•CSV: Select this option to display an Excel© version of the audit data.
•Previous/Next: Use these option to move to the next or previous page of data. The maximum number of transactions per page may be adjusted in the parameters.