|
<< Click to Display Table of Contents >> Create a New Document |
  
|
|
<< Click to Display Table of Contents >> Create a New Document |
|
To create a new topic and its corresponding documents, select Create a New Document.
Select Web Client > Tables > Clinical > Patient Education Maintenance > Create a New Document
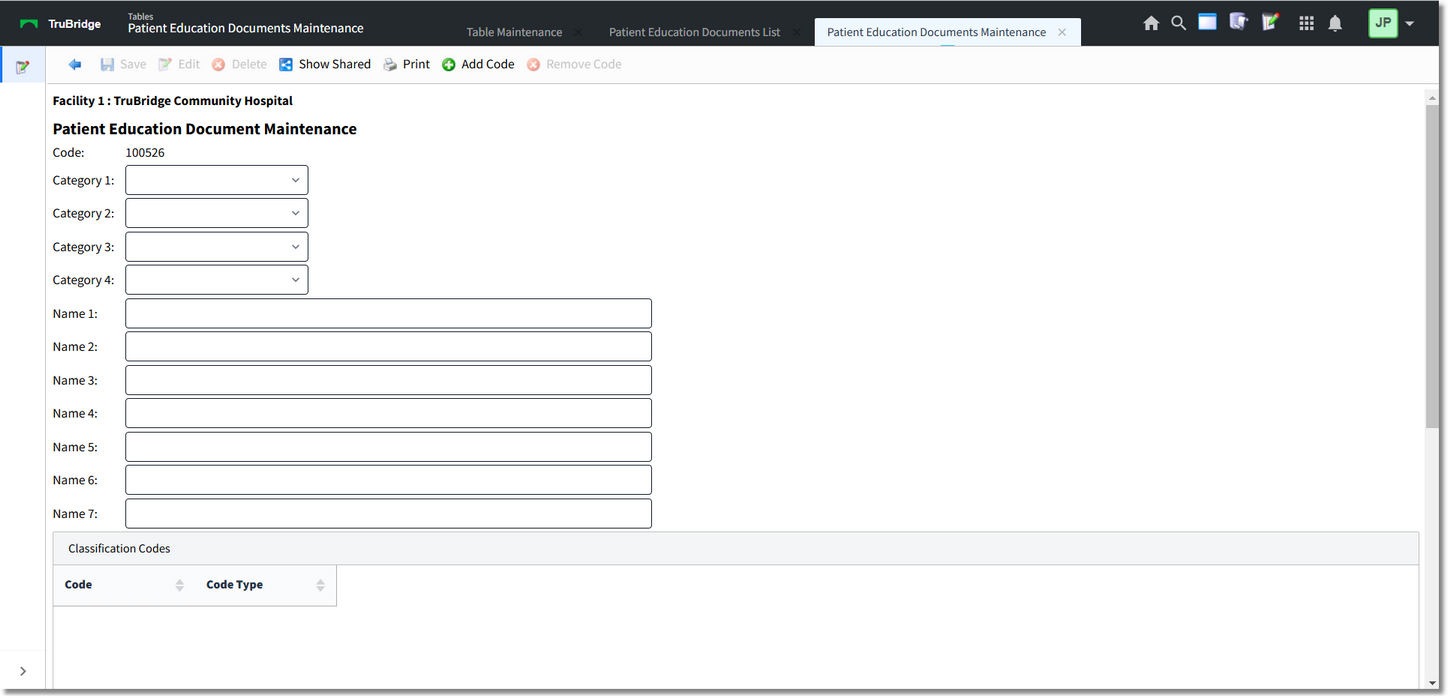
Patient Education Documents
•Code: Topics are assigned a unique code up to six digits long.
•Category 1 - 4: Enter up to four categories for search purposes. Select Save on the action bar to save changes.
•Name 1 - 7: Enter the topic description in field one. Enter alternate search terms in fields two through seven if applicable. Select Save on the action bar to save changes.
•Classification Codes: If applicable, classification codes including ICD-9, ICD-10, LOINC and/or SNOMED codes may be added.
▪Select Add Code from the action bar.
▪Key the code in the applicable field (LOINC codes must be entered manually), or select the Binoculars adjacent to the code type for a lookup menu
▪The codes list alphabetically by description. The list defaults to active codes. Select Exclude expired to include expired codes in the listing. A code may be located by Description or Code using the search field and the drop-down menu. The list may also be sorted by the column headers. Select the description then Copy from the action bar to add the code. Select Save from the Classification Code Menu.
▪To remove a code, select it from the Patient Education Document Maintenance screen, then select Remove Code from the action bar.
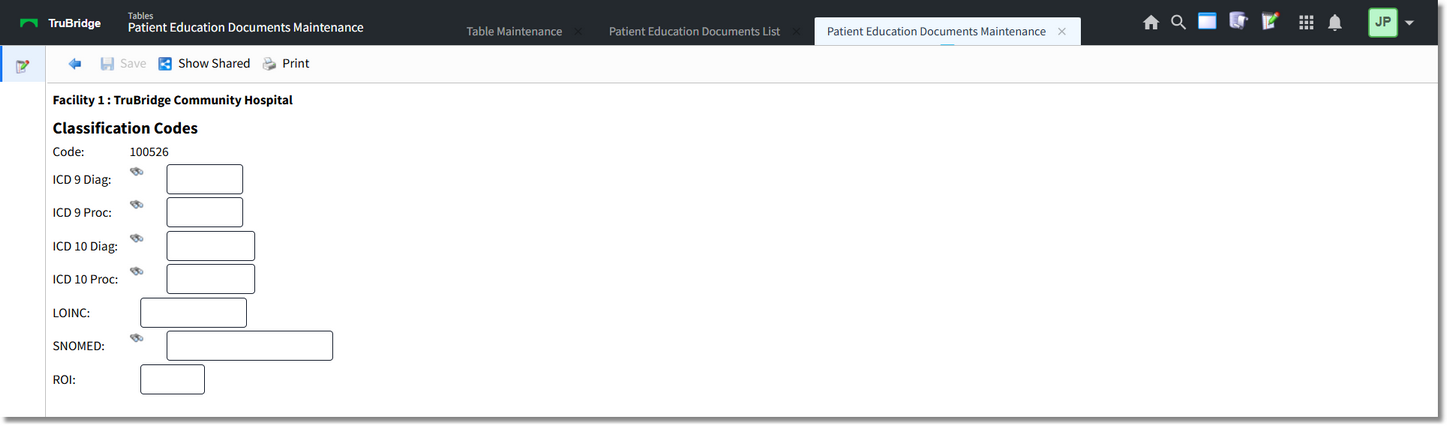
Classification Codes
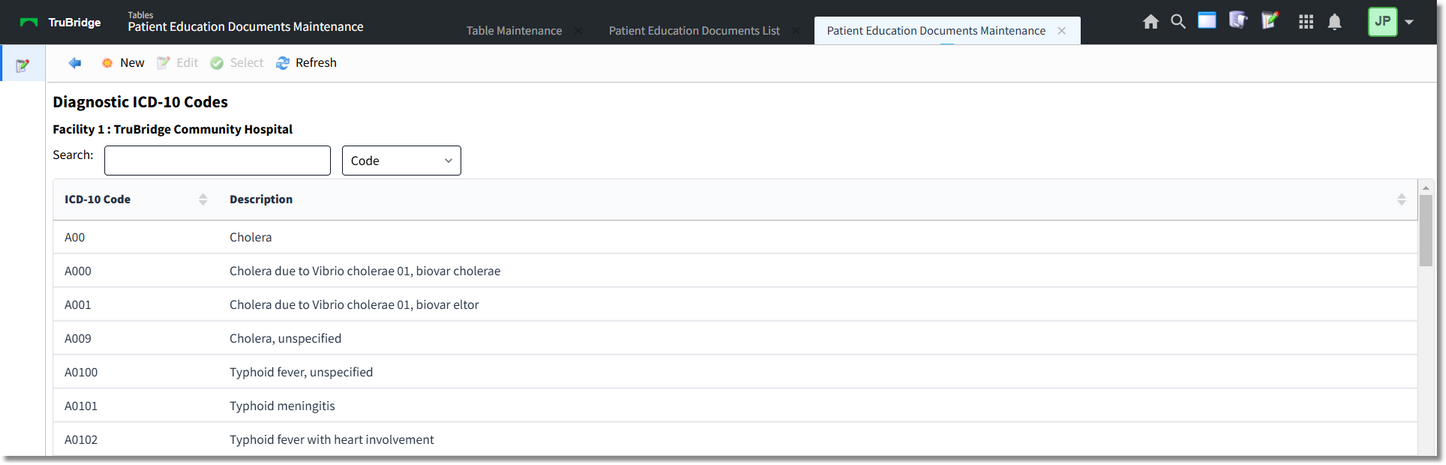
Diagnosis Search
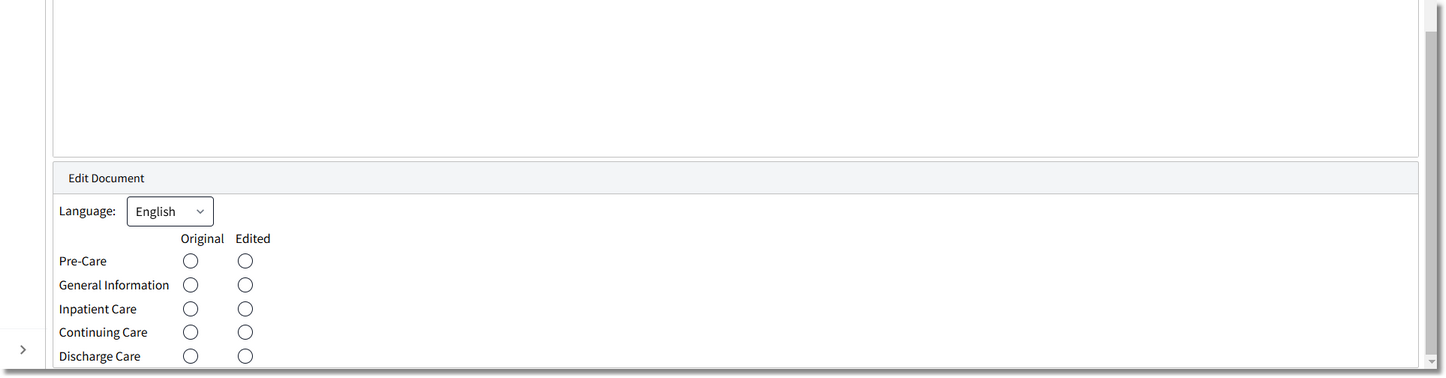
•Edit Document: Select English or Spanish to determine the version of the document to be created. To create the custom document, select the radio button in the 'Edited' column for the document type then Edit on the action bar to launch Microsoft Word. Enter the document then save and exit from Word. Select Yes to save the custom document or No to abort.
•To delete a document, select English or Spanish to determine the version of the document to be deleted. Select the radio button in the 'Edited' column for the document type then Delete on the action bar. Select Yes to delete or No to abort.
Additional options available via the action bar:
•Back Arrow: Select this option to return to the previous screen.
•Show Shared: This option will display setup being shared by multiple facilities.
•Print: Select this option to print setup.