|
<< Click to Display Table of Contents >> Med Verify Control Table |
  
|
|
<< Click to Display Table of Contents >> Med Verify Control Table |
|
The Med Verify Control Table houses all Med-Verify settings.
Select Web Client > Tables > Clinical > Nursing category > Med Verify Control Table
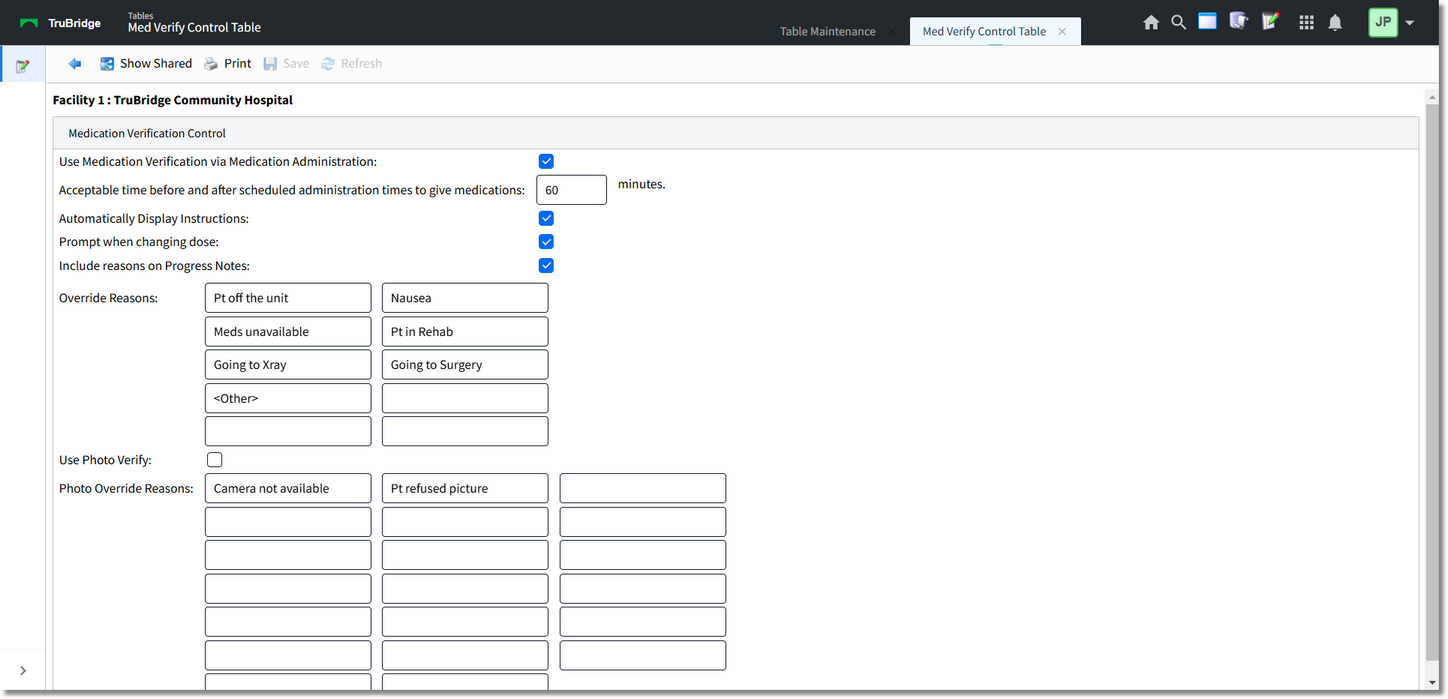
Medication Verification Control
•Use Med Verify Via Medication Admin: When selected Med-Verify may be accessed from all EMAR screens.
•Acceptable time before and after scheduled administration times to give medications (Time in Minutes): Enter the number of minutes used to determine the acceptable time before and after the schedule date/time to administer medications.
•Enable PRN administration time range warning: Select this option to enable the PRN Time Range Warning which generates in Med-Verify if PRN medications are documented too close together in time. The acceptable time range must be entered on each PRN Frequency in the Pharmacy Frequency Table. Please refer to your Pharmacy Department for additional information.
•Automatically Display Instructions: Select this option to display Medication Instructions immediately after scanning a medication in Med-Verify.
•Prompt when changing dose: If selected, the user will receive a warning prompt when changing the dose of a medication in Med-Verify.
•Include reasons on Progress Notes: Select this field to include Override Reasons documented via Med-Verify on the Patient Progress Notes.
•Override Reasons: Enter up to ten Override Reasons to be used when overriding warning prompts in Med-Verify.
•Use Photo Verify: Select this option to enable Photo Verify via Med-Verify.
•Photo Override Reasons: Enter up to twenty Override Reasons to be used when overriding warning prompts in Photo Verify.
•After setup is complete, the following options are available:
▪Show Shared: Select to display setup being shared by multiple facilities.
▪Print: Select to print setup.
▪Save: Select to save modifications.
▪Refresh: Select this option to apply any changes made to the setup before the system completes an automatic refresh.
▪Blue back arrow: Select to return to the previous screen.