|
<< Click to Display Table of Contents >> Fax Number Setup |
  
|
|
<< Click to Display Table of Contents >> Fax Number Setup |
|
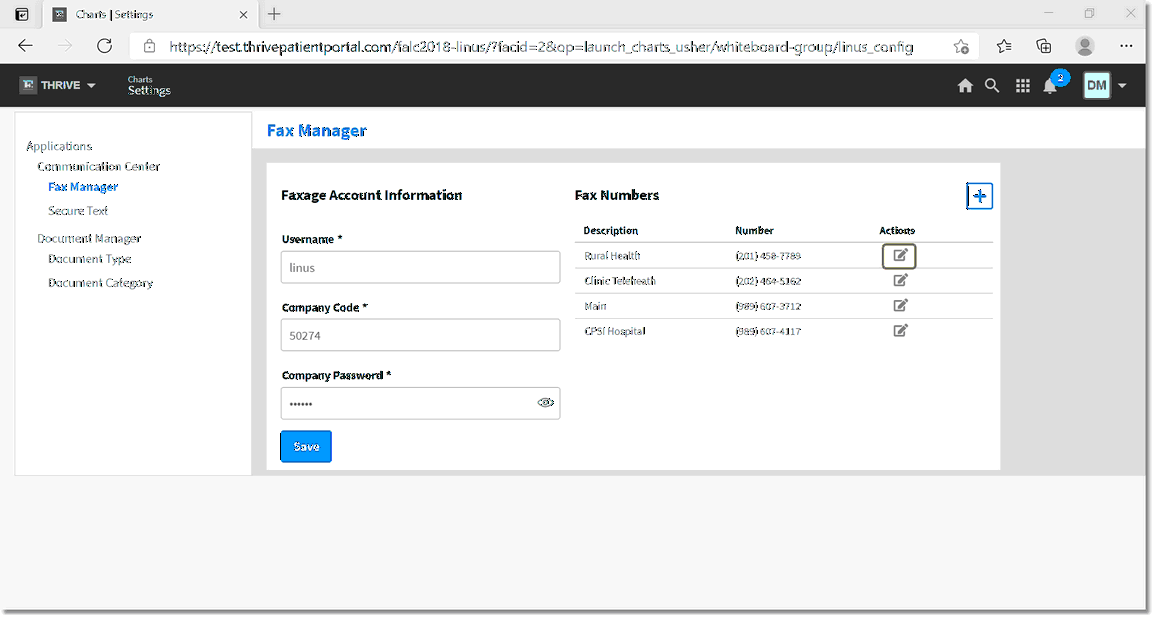
Select the Configure Icon ![]() to open the Fax Manager. The Faxage Account information must be placed in the Fax Manager Information screen. NOTE: The Application permission for Communication Center - Configuration must be granted for access to the Configuration area.
to open the Fax Manager. The Faxage Account information must be placed in the Fax Manager Information screen. NOTE: The Application permission for Communication Center - Configuration must be granted for access to the Configuration area.
Select Web Client > Configuration Icon > Fax Manager
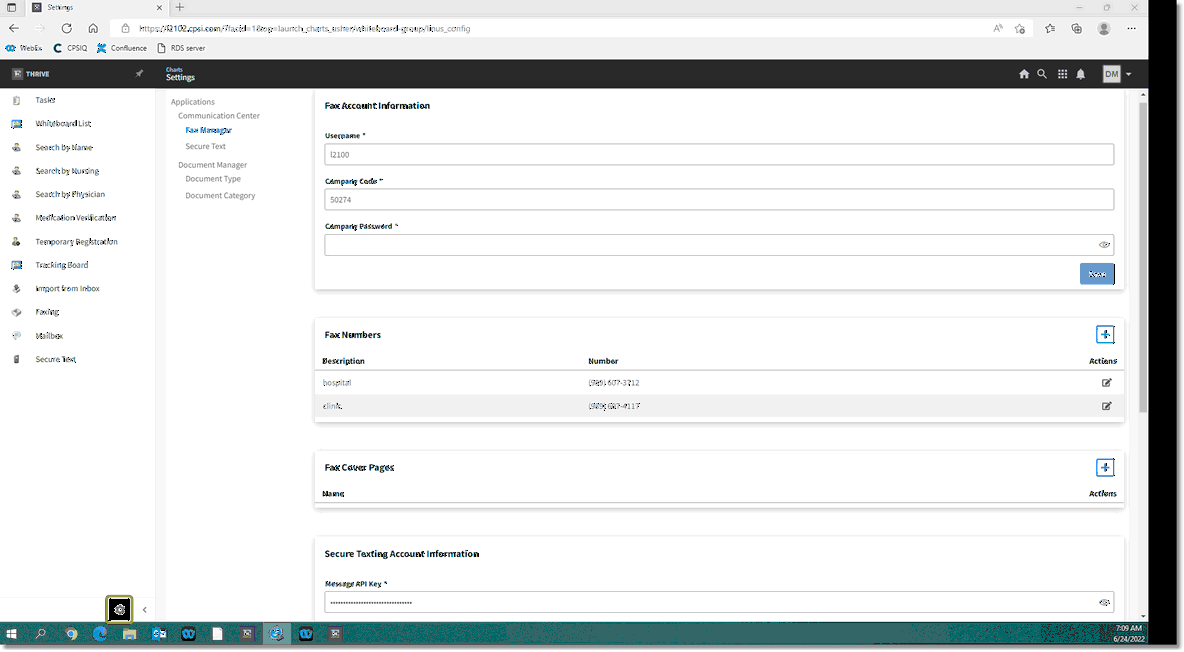
Fax Manager
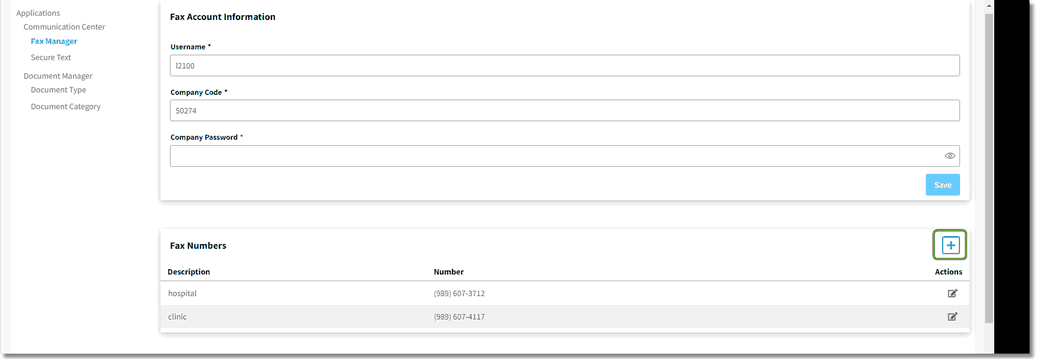
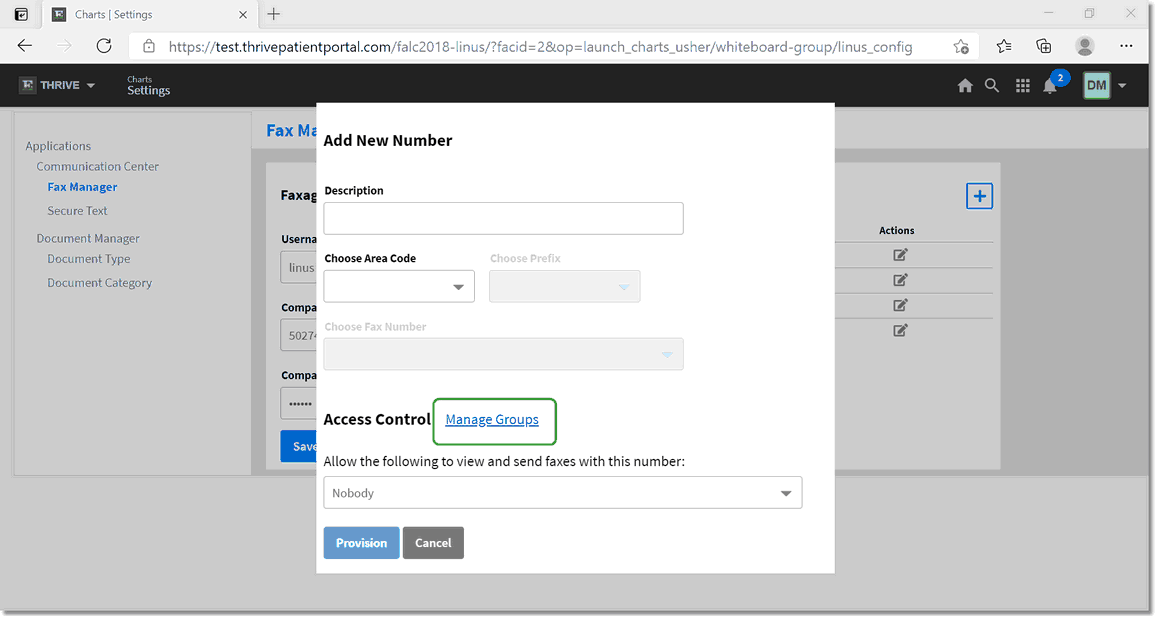
The fax numbers which have been added from Faxage will be visible once credentials have been confirmed. If you would like to add a new number to your Faxage account without having to login to Faxage, you can select the Plus Sign icon to choose your number. Note: Please refer to your Faxage account's pricing rates as adding a new number here is subject to a monthly fee.
The same steps as demonstrated below can be used to edit an existing fax number by selecting the Edit Icon instead of the Plus Sign. These steps are demonstrated at the end of this chapter.
Select Web Client > Configuration Icon > Fax Manager > Plus Sign
Plus Sign Icon
The default for the Access Control is "Nobody". This may be changed by selecting the Dropdown menu in the Access Control area.
Select Web Client > Configuration Icon > Fax Manager > Plus Sign
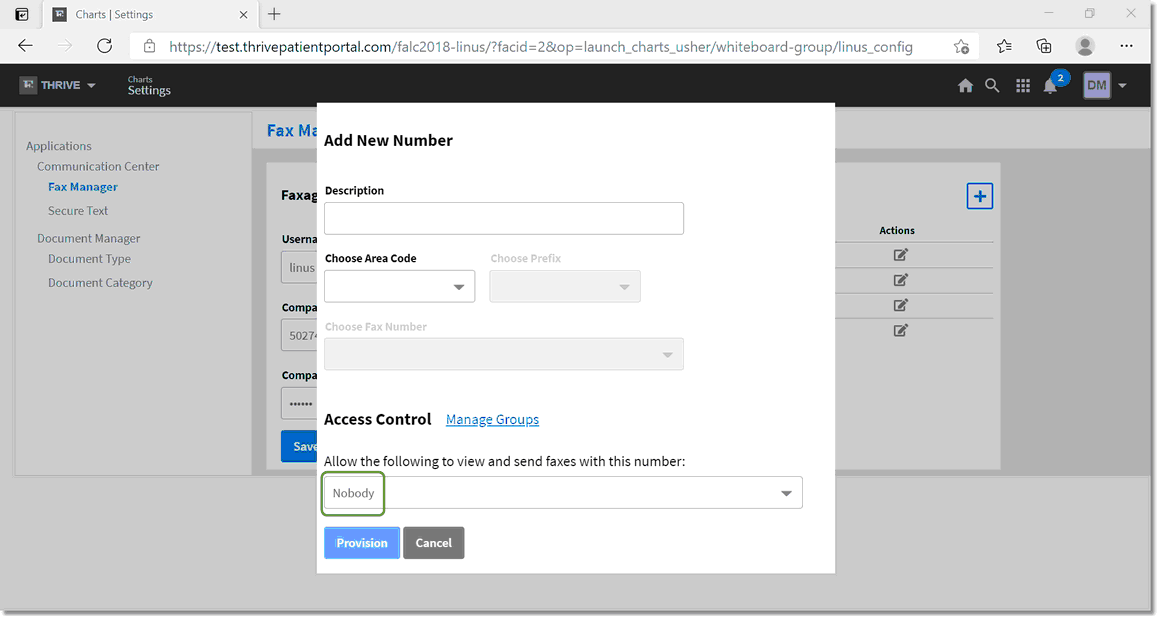
Access Control
Select Web Client > Configuration Icon > Fax Manager > Plus Sign
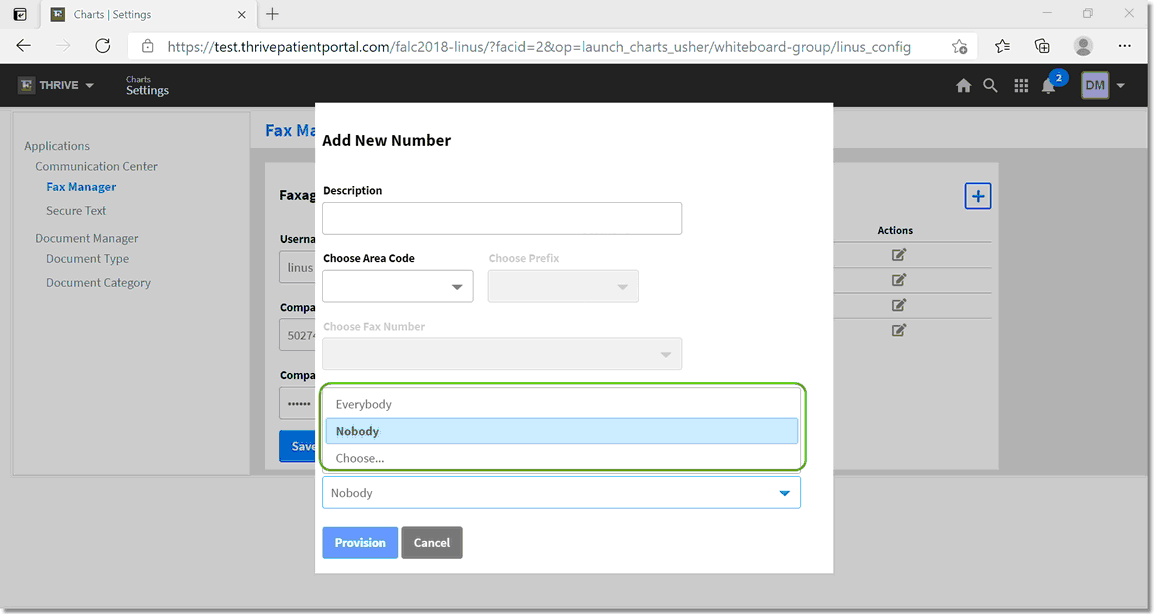
Access Control Dropdown
Other options will allow "Everybody" to view and send faxes from the designated fax number, or a specific "Group" may be set up and assigned the ability to view and send faxes from the designated number.
The directions for creating a group will now be shown:
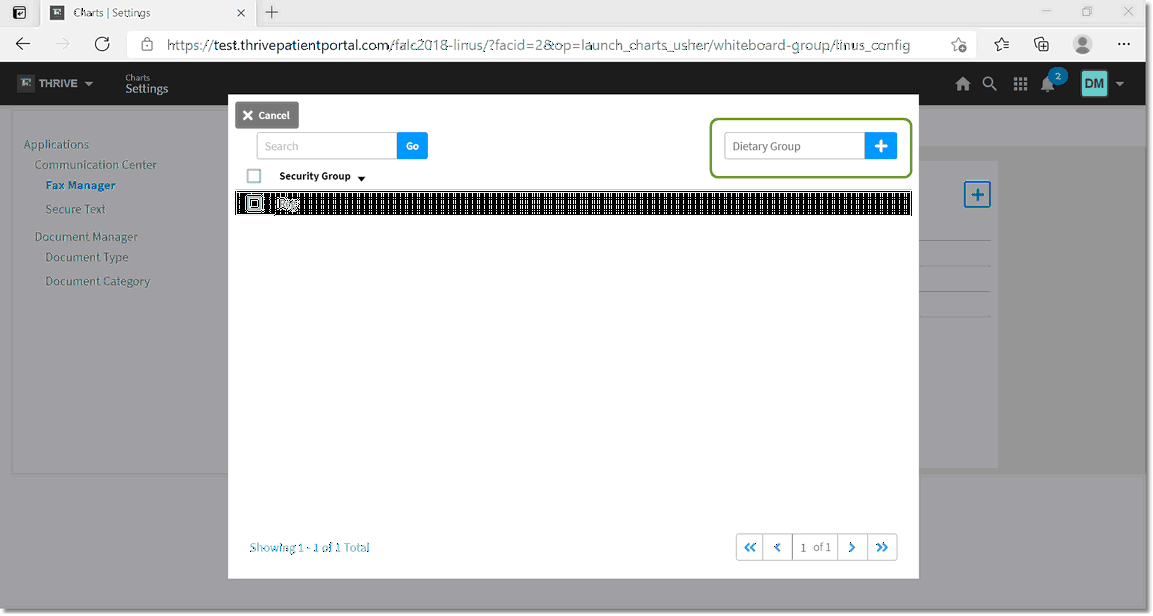
Select Manage Groups from the Edit Screen.
Select Web Client > Configuration Icon > Fax Manager > Plus Sign > Manage Groups
Manage Groups
Enter the name of the group and select the Plus (+) sign.
Select Web Client > Configuration Icon > Fax Manager > Plus Sign > Manage Groups
Create a Group
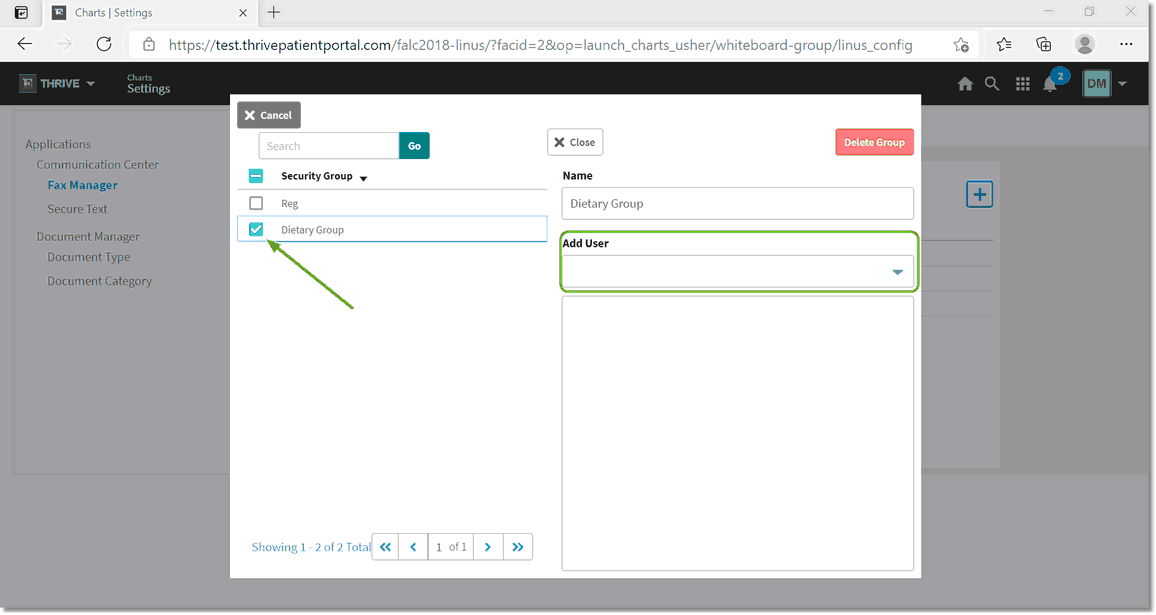
Select the check box beside the group name. From this screen users may be added to the group by entering their name in the Add User box.
Select Web Client > Configuration Icon > Fax Manager > Plus Sign > Manage Groups
Add User
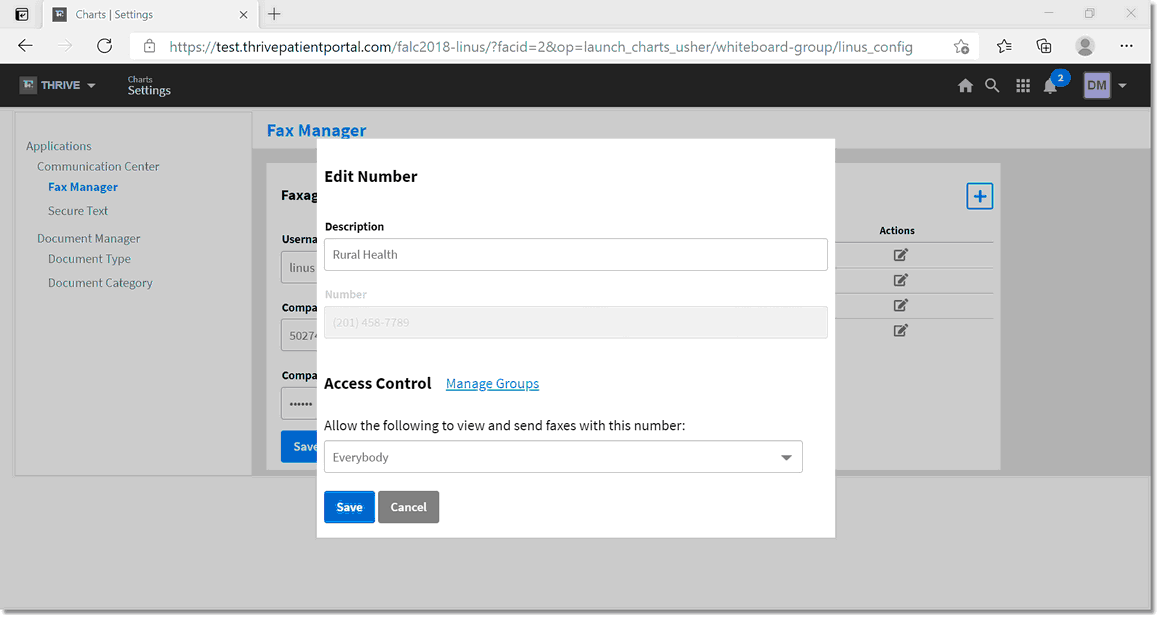
A saved fax number may be edited by selecting the Edit Icon ![]() from the Fax numbers list.
from the Fax numbers list.
Select Web Client > Configuration Icon > Fax Manager > Edit Icon
Edit a number
From here, the Description and Access Control may be edited as demonstrated earlier in this section.
Select Web Client > Configuration Icon > Fax Manager > Edit Icon
Edit a Number