|
<< Click to Display Table of Contents >> From the Navigation Panel |
  
|
|
<< Click to Display Table of Contents >> From the Navigation Panel |
|
From the Navigation Panel, Select Mailbox.
Select Web Client > Mailbox
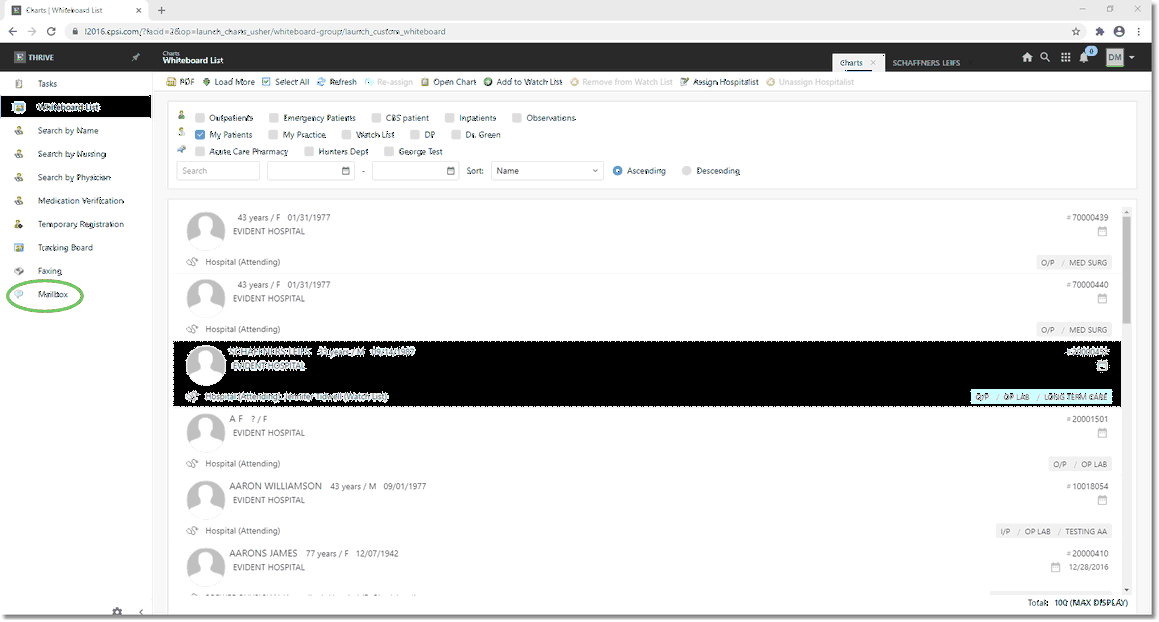
Navigation Panel
The Mail Inbox will display.
Select Web Client > Mailbox
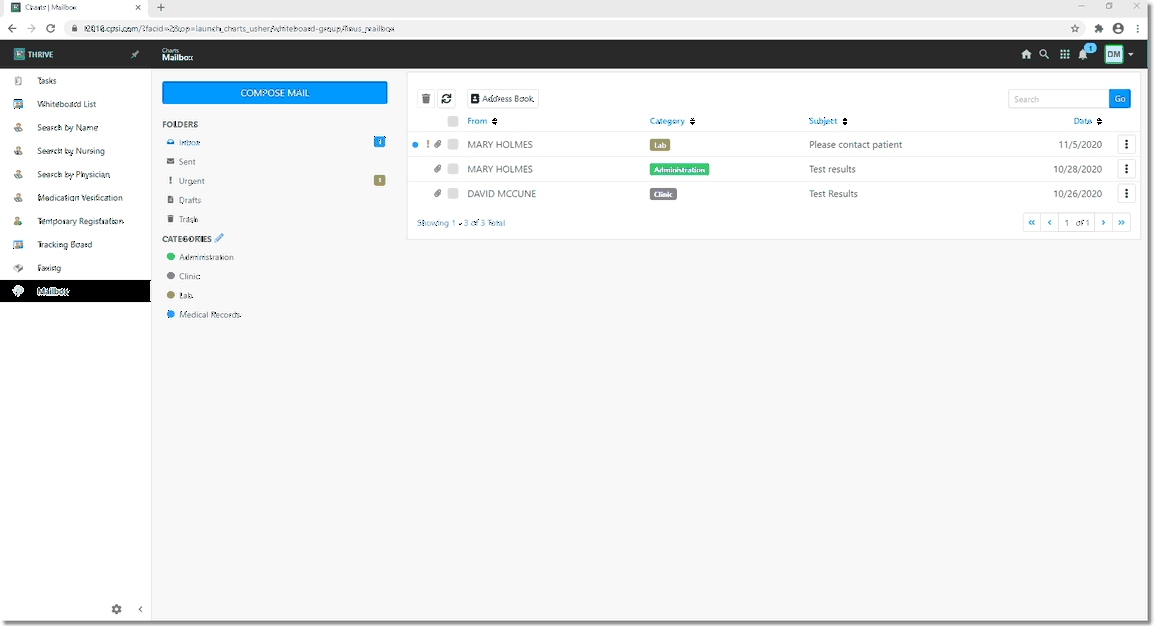
Mail Inbox
The Mail Inbox will display all incoming mail in a list format. The column headings are:
| • | From - Displays the sender of the mail. If the name of the sender is not in the Address Book, the sender's number will display instead. A blue dot to the left of From column indicates that the message is unread. A paper clip icon |
| • | Category: This allows the user to group messages according to user-defined categories. Select the arrow in the column header to filter all messages by Category. |
| • | Subject: Displays the title of the message from the sender. Select the arrow in the column header to have the messages in reverse alphabetical order. |
| • | Date: Displays a date stamp of when the message was received. Select the arrow in the column header to have the messages display in reverse chronological order. |
| • | The box with the 3 circles |
There are 5 folders options to the left. They are:
| • | Inbox: Displays all incoming active messages. The number to the right indicates unread messages. |
| • | Sent: Displays all outgoing or forwarded active messages. |
| • | Urgent: Displays all received messages that were marked with "!" by the sender. |
| • | Drafts: Displays all composed messages that have been "Saved" but not yet sent. |
| • | Trash: Displays all messages that have been deleted from the active lists. |
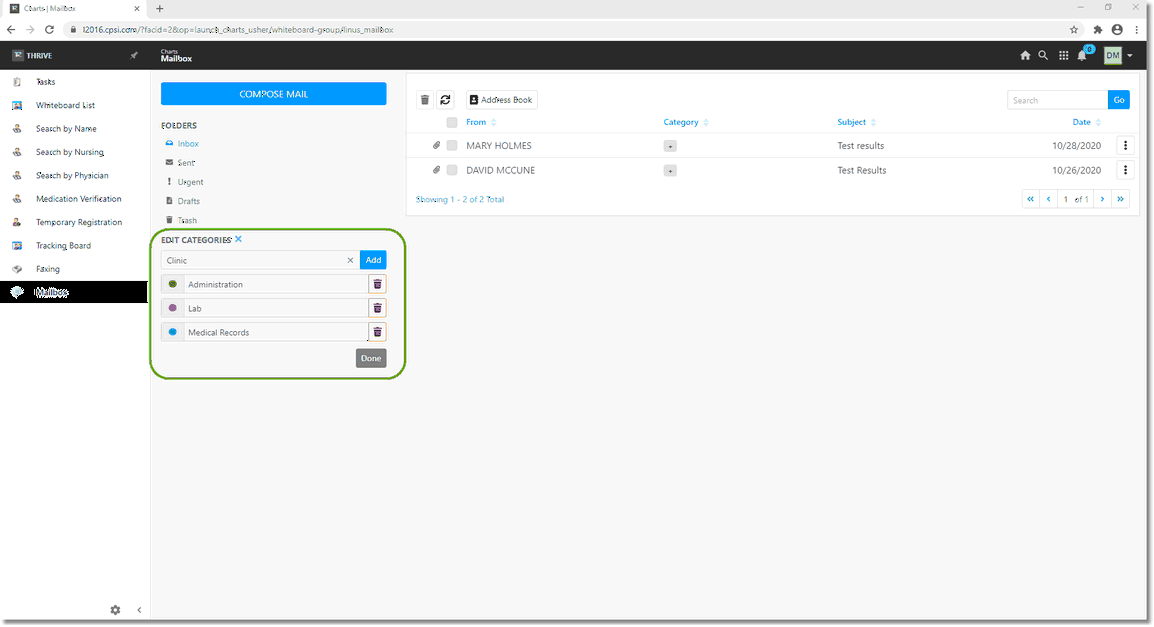
User-defined Categories may be created in order for the user to group and filter messages.
To create or Edit/Delete a Category:
| • | Select the Pencil Icon |
| • | Enter the desired description of the Category. |
| • | Select Add. |
| • | Select Done when finished. |
| • | A Category may be deleted by selecting the Trash Can Icon after selecting the Pencil icon. Thrive will send a prompt message if a Category to be deleted has messages attached to it. after selecting the Pencil icon. Thrive will send a prompt message if a Category to be deleted has messages attached to it. |
Thrive will automatically color-code each category to make the categories easier to use.
Select Web Client > Mailbox
Categories
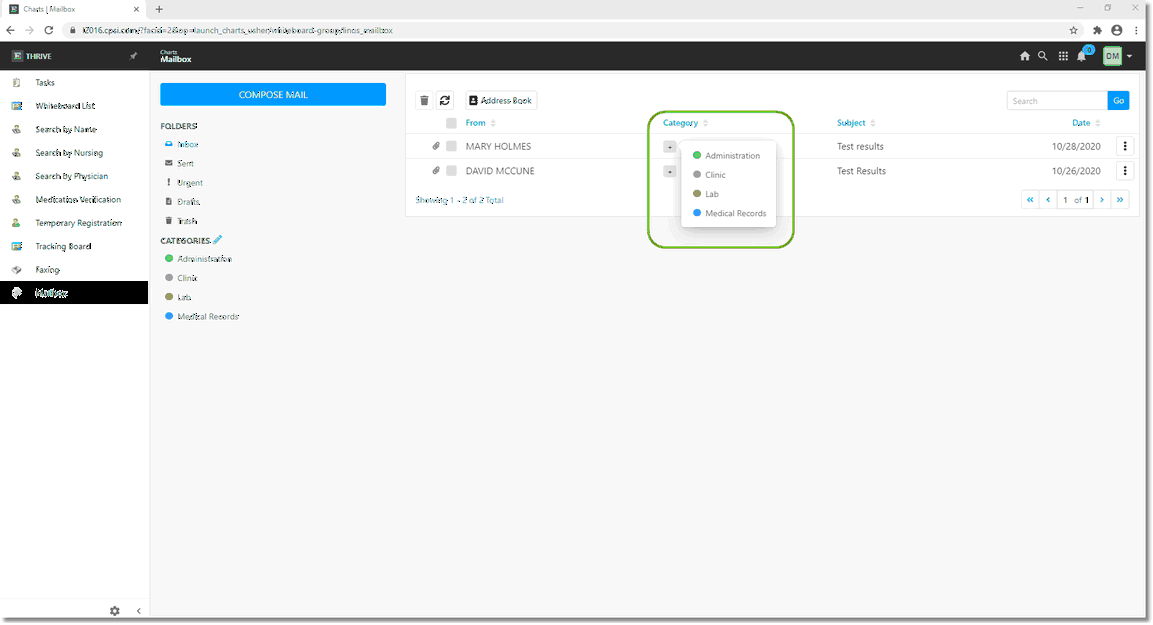
To attach a message to a specific Category:
| • | Select the Plus Sign icon (+) in the Category column. |
| • | Once Categories have been attached to messages, the Category column may be filtered by group. |
Select Web Client > Mailbox > Categories
Categories
To View a Message:
Select the desired message from any of the 5 folders.
Select Web Client > Mailbox > Select Mail
Select Mail
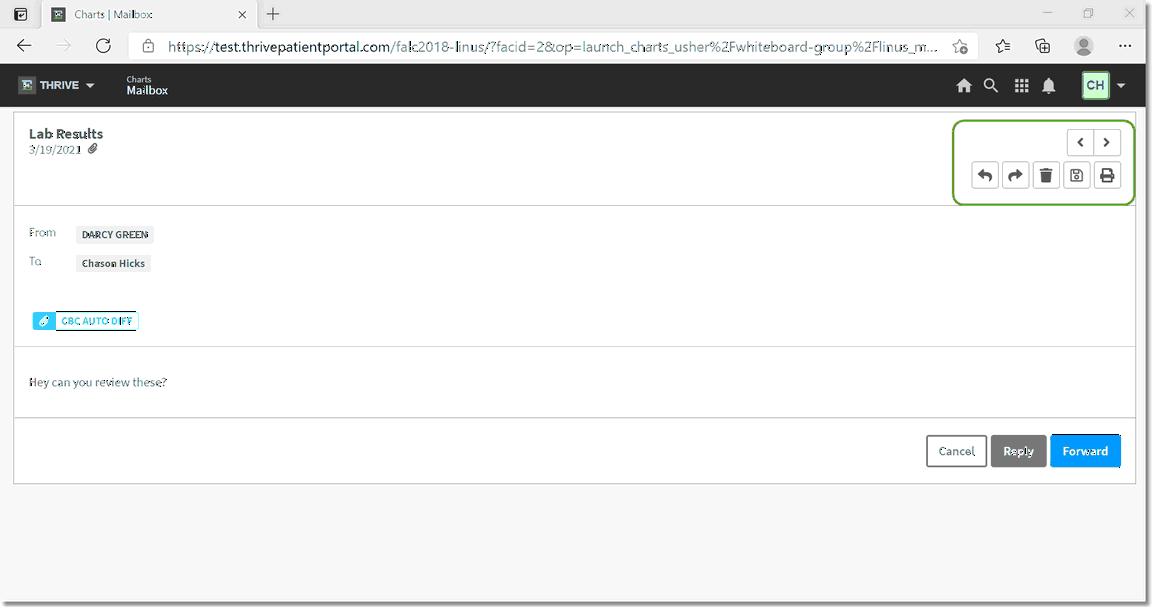
The selected Message will open with the following screen options:
Mail View Screen options:
| • | Left icon (<) - This will take the user to the previous message in the list for viewing. |
| • | Right icon (>) - This will take the use to the next message in the list for viewing. |
| • | Left Arrow - This will allow the user to Reply to the message. (User may also select the Reply button.) |
| • | Right Arrow - This will allow the user to Forward the message to another user. (User may also select the Forward button.) |
| • | Trash Can Icon - This will allow the user to Delete the message. |
| • | Save Icon |
| • | Printer Icon - This will allow the user to Print the message. |
Attachments on the message may be opened by selecting them.
Select Web Client > Mailbox > Select Mail > Open Attachment
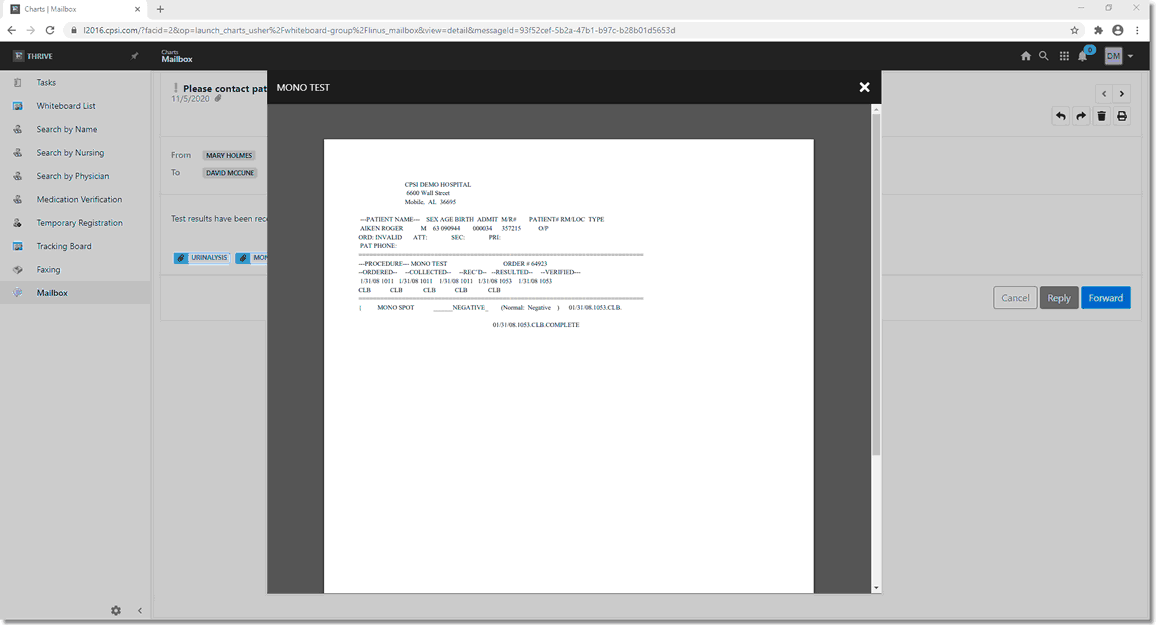
Open Attachment
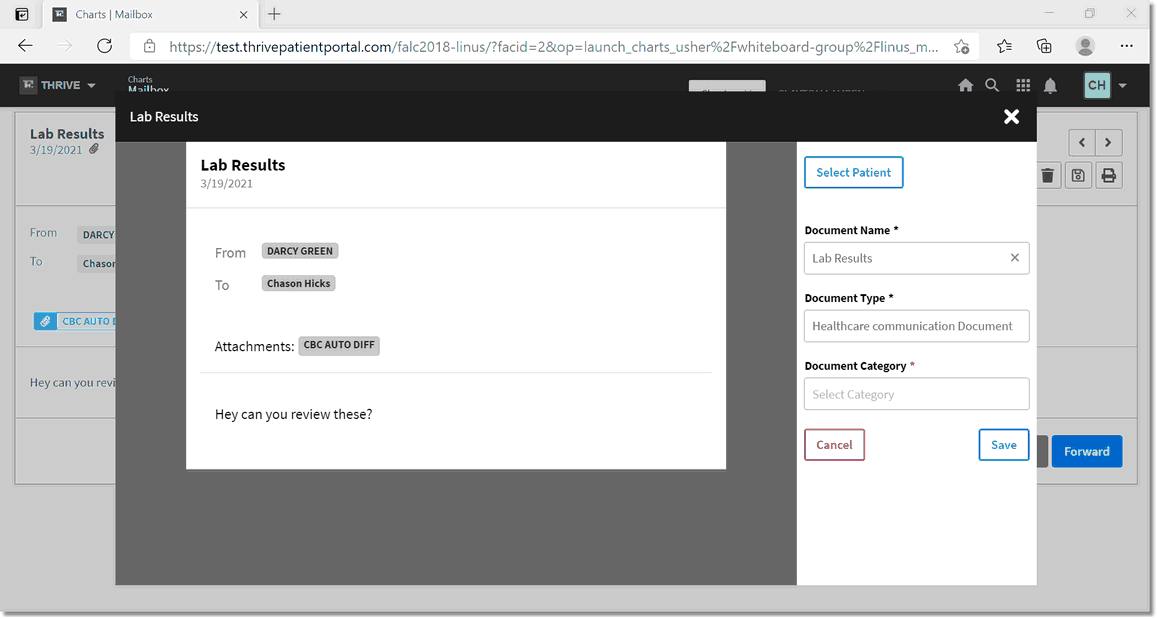
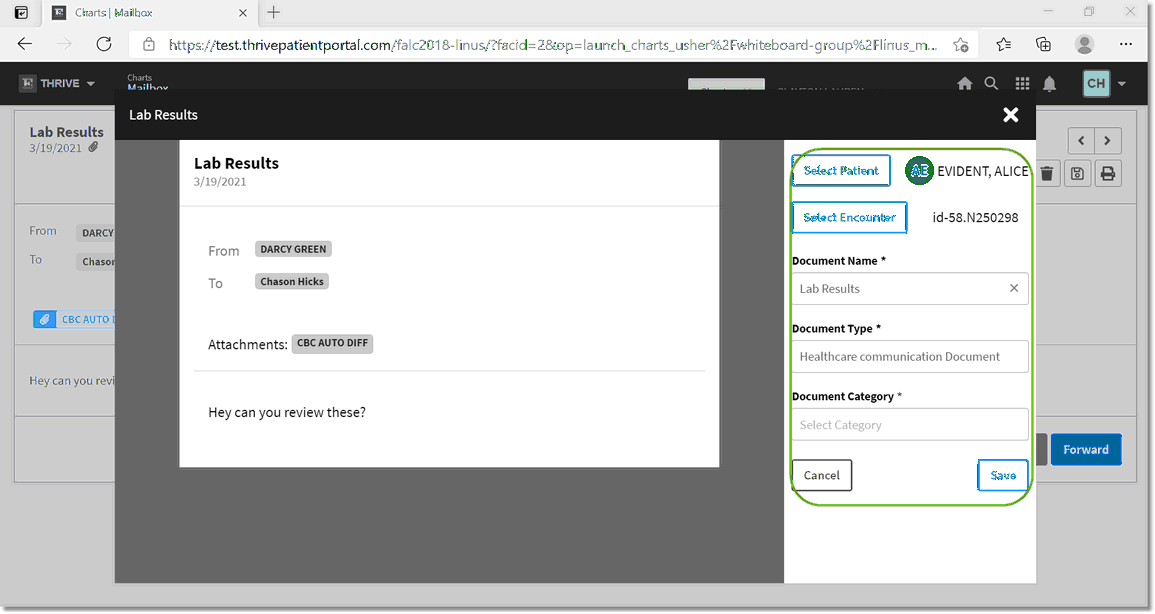
To save the Mailbox message to a patient chart, select the Save Icon ![]() .
.
Select Web Client > Bell Icon > Select Mail > Save Icon
Save to Patient
Choose Select Patient to attach the message to a patient chart. Enter the patient's name in the Search field and then select the correct patient.
Select Web Client > Bell Icon > Select Mail > Save Icon > Select Patient > Search for Patient
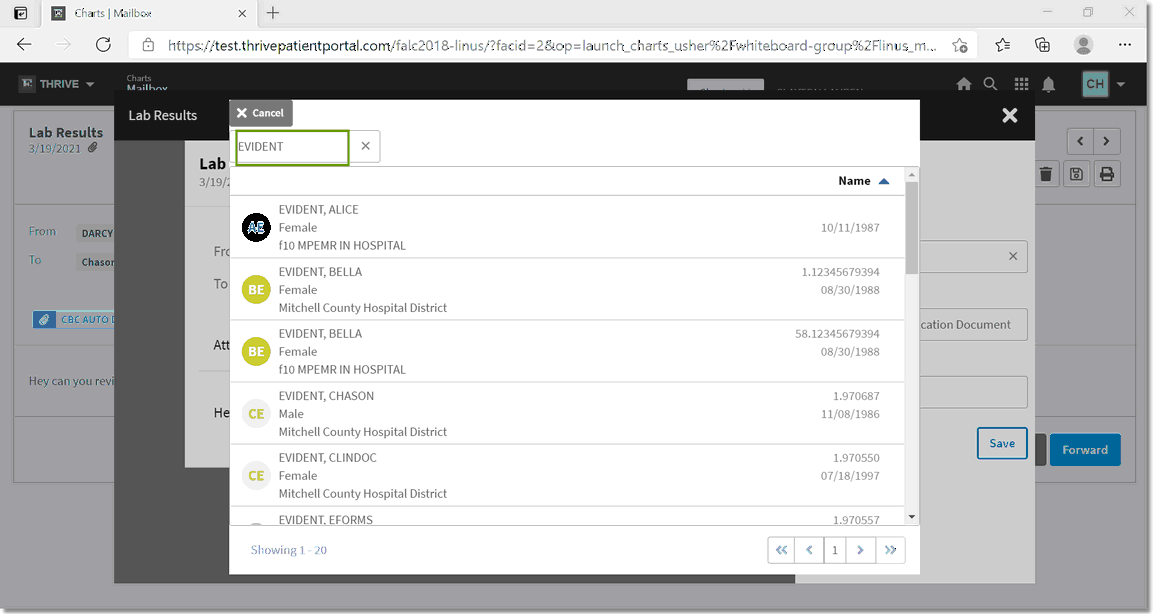
Select patient
The message will be saved to the patient on the profile level. If the message is to be saved to a specific encounter, choose Select Encounter and choose the desired patient encounter. A Document Name can be given to the saved message, along with a Document Type and a Document Category. The Document Type is defaulted to Healthcare Communication Document. The user may overwrite this default if desired. Select Save.
Select Web Client > Bell Icon > Select Mail > Save Icon
Add to Encounter