|
<< Click to Display Table of Contents >> From the Navigation Panel |
  
|
|
<< Click to Display Table of Contents >> From the Navigation Panel |
|
Faxing may be accessed from the Charts contextual Navigation Panel. To compose a fax from the Navigation Panel, select Faxing and then Compose Fax.
Select Web Client > Faxing
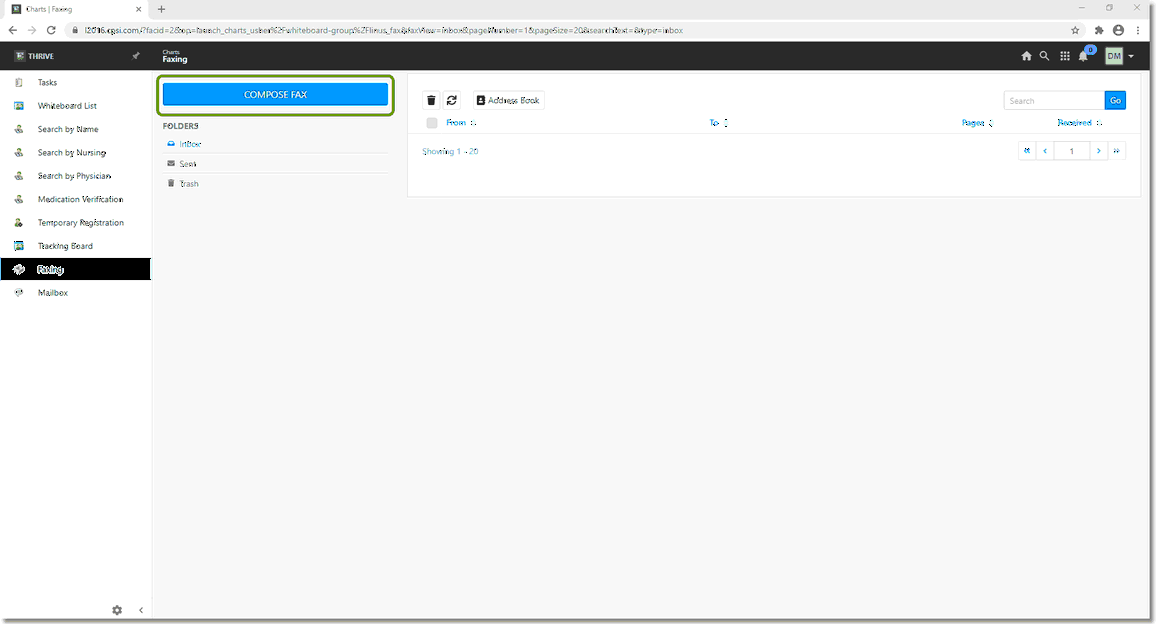
Faxing from the Navigation Panel
Select Web Client > Faxing > Compose Fax
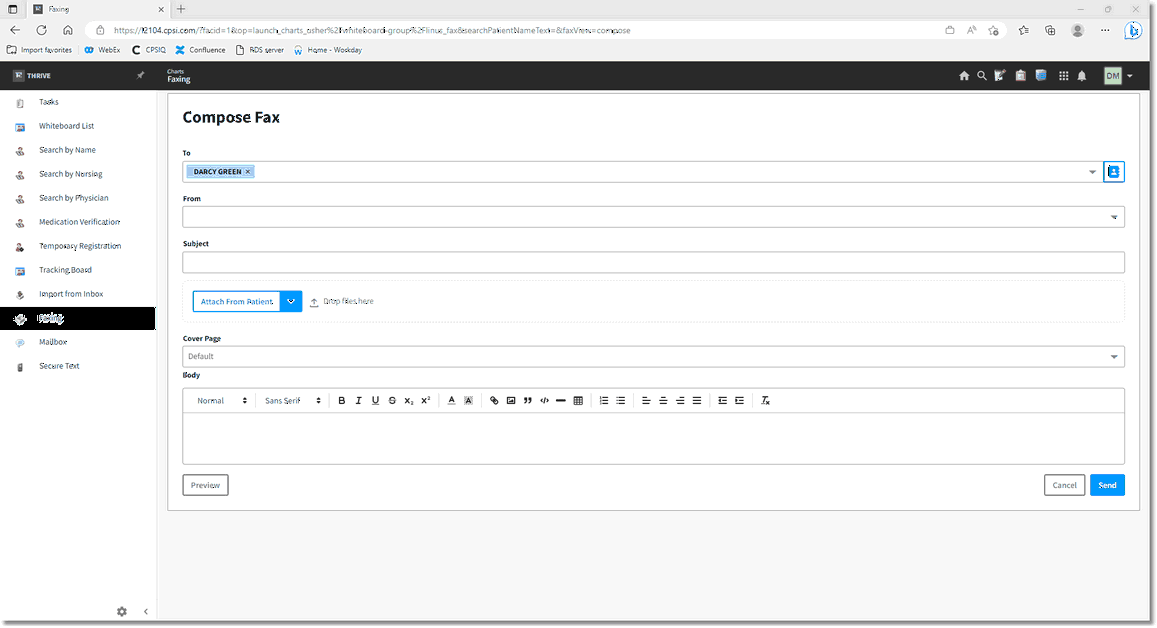
Compose Fax
From the Compose Fax screen, follow the steps below to compose and send a fax:
The "To" field is for the recipient of the fax. There are 2 options for this field:
| • | Begin by entering the name of the recipient. This will search the Address Book for matches. |
| • | Enter a 10-digit number directly in the number field. This will also search for any matching numbers. |
The "X" to the right of each recipient's name in the "To" field will remove that specific individual. There is no limit to the number of recipients of the fax.
The "From" field will have a site specific dropdown menu from which to select. The options will be the fax numbers that have been set up through Faxage and to which the user has been given access.
Select the "Cover Page" dropdown box to have a cover page attached as the first page of the fax. This will display a listing of all fax cover pages. See the Fax Cover Page section under "Required Setup" for instructions on creating a Cover Page.
Attachments may be added to the fax. They may be uploaded from the user's computer or directly from the patient chart. Attached documentation may be previewed prior to sending.
Select Web Client > Faxing > Compose Fax > Attach from Patient
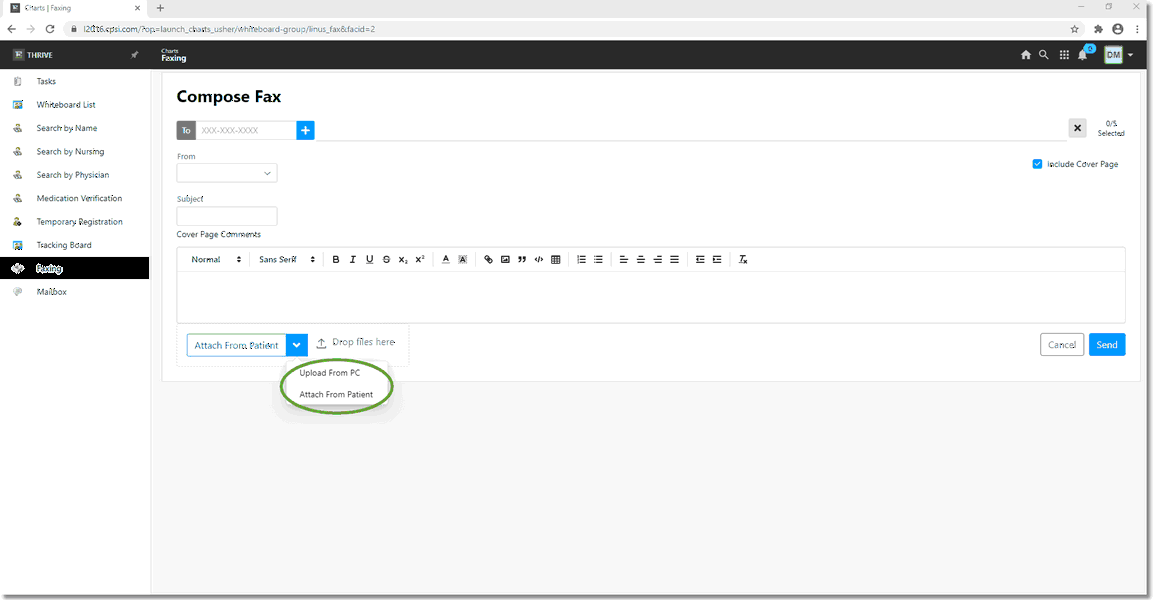
Attach from Patient
In order to view a fax that was sent, select the Sent folder. A time/date stamp will display in the Sent column. The number of pages will display in the Pages column.
Select Web Client > Faxing > Sent Folder
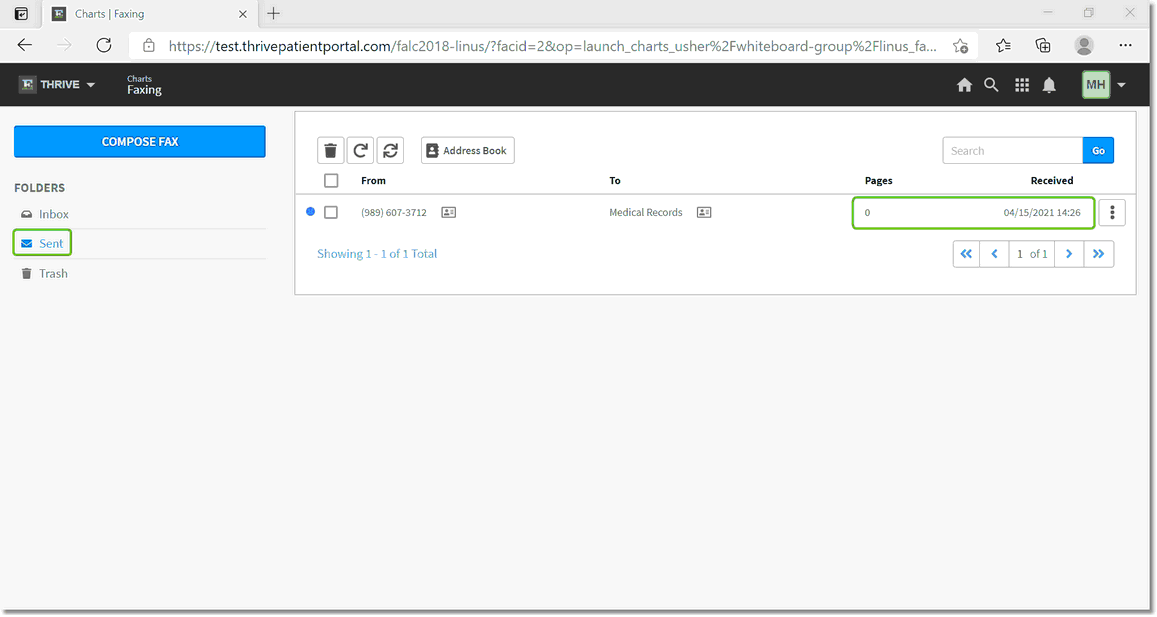
Fax Confirmation