|
<< Click to Display Table of Contents >> Configure Flag Filters |
  
|
|
<< Click to Display Table of Contents >> Configure Flag Filters |
|
Filters may be selected or created in order to delimit the lab results on the Results Summary Screen.
A filter may be added by the user from within the Lab Results Application.
An administrator with access to System Administration may also create a filter for a user.
PATH: From the Application Drawer select System Administration > Select User > From the Navigation Panel select Filters > Select Test Result Filter. From here, the directions to create a filter will be the same as for a user-created filter.
Select Web Client > Charts > Patient Chart > Lab Results
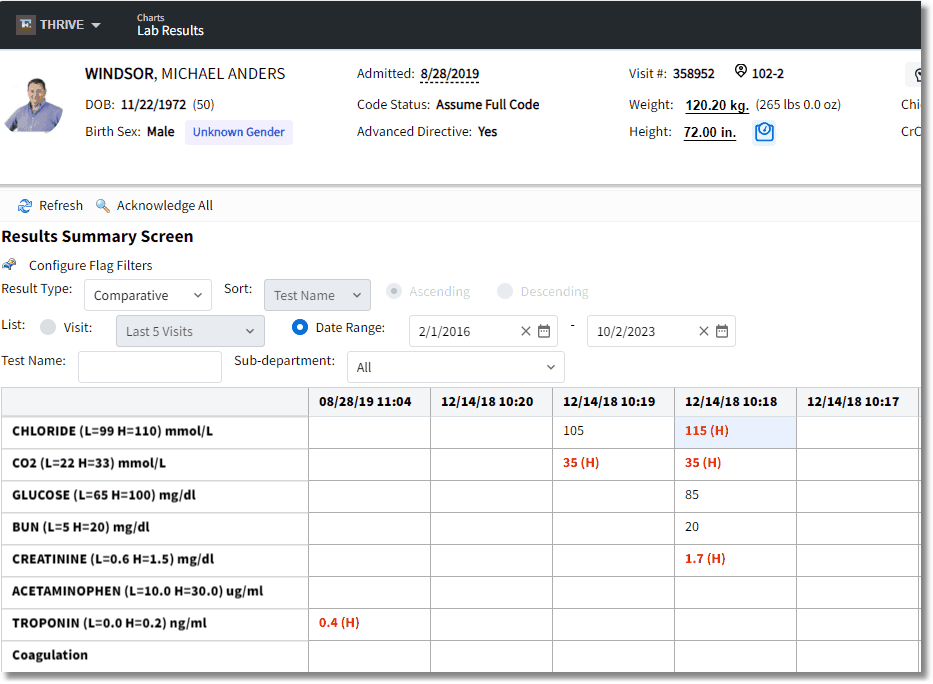
Configure Flag Filters
Begin by selecting the Bed Icon beside Configure Flag Filters. Then select Add to open the existing library for the filters. This will display the Evident-created default filter titled "Exclude Pending Orders" and any other filters that have been created by your facility.
To select the Exclude Pending Orders filter:
| • | Either double-click Exclude Pending Orders from the library listing or single-click it and then Select. This will add it to your filters. After selecting a filter, it will default as selected. If you would like the filter to be unchecked as a default, highlight the filter and select Default Unchecked. From here, select the Back Arrow and your filter will be added. NOTE: You may need to close the chart and then reopen it for the filter to display. |
To create a new filter for Abnormal Labs:
| • | From the library of existing filters, select New. Then select (Filter Title) and name the filter Abnormal Labs and select OK. Select Add. |
| • | From the displayed list of filter parameters, scroll down to RESULT_FLAG and select it. |
| • | Select "is equal to one of". |
| • | Enter the values of H, C, HC, LC, A, AC. This will filter for any results that are High, Low, High Critical, Low Critical, Abnormal, or Abnormal Critical. |
| • | Select the Back Arrow twice until you can select the Save button in the Action Bar. This will add it to the library listing of filters. |
| • | Either double-click the Abnormal Lab filter from the library listing or single-click it and then Select. This will add it to your filters. After selecting a filter, it will default as selected. If you would like the filter to be unchecked as a default, highlight the filter and select Default Unchecked. From here, select the Back Arrow and your filter will be added. NOTE: You may need to close the chart and then reopen it for the filter to display. |