|
<< Click to Display Table of Contents >> Barcode Scanning |
  
|
|
<< Click to Display Table of Contents >> Barcode Scanning |
|
To automatically place the images in the document folder select the ![]() barcode icon before scanning the image. Once this is selected the following screen will appear.
barcode icon before scanning the image. Once this is selected the following screen will appear.
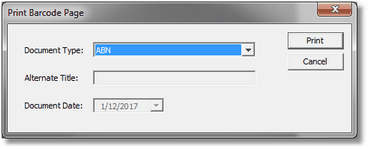
Print Barcode Page
•Document Type: Select the document title for the pages selected. This pulls from the Image Title table in Table Maintenance.
•Alternate Title: Enter the Alternate Title for this document. This option will be available if "Alternate Title Prompt" is selected in the Image Title table in Table Maintenance.
•Document Date: Select the document date to be used for this Document Title.The default will be the current date. The date entered will display next to the Image Title on the patient’s account. This option will be available if "Enter Document Date" is selected in the Image Title table in Table Maintenance.
Select Print to print the barcode sheet or Cancel to not print the barcode sheet.
This option will allow a barcode sheet to be printed. Each document type will have its own barcode sheet. Once the Barcode sheet is printed, it will need to be placed in front of the batch of images to be scanned.
If scanning a batch of different documents, a barcode sheet may be printed for each document. Place the barcode sheet in front of the batch that pertains to that document type. This will allow the system to locate the correct folder the images should be placed.
An image may then be scanned by selecting the ![]() scanner icon or uploaded from the camera by selecting the
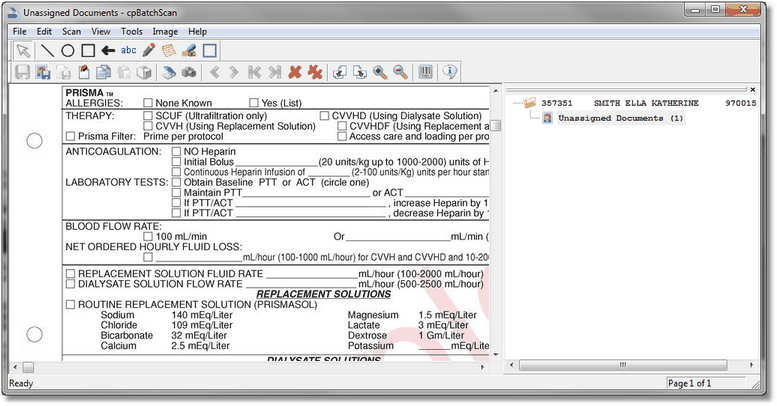
scanner icon or uploaded from the camera by selecting the ![]() camera icon. The image will display once it is scanned or uploaded as shown below.
camera icon. The image will display once it is scanned or uploaded as shown below.
Select Web Client > Charts > Select Patient Account > Scanned Images > Batch Scanning > New Project > Scanned/Camera
Batch Scanning
Once the image is displayed in the system, icon options at the top of the screen may be used for editing. Listed below are explanations of the icons.
•![]() No Annotation Tool: This option will allow the pointer to be used.
No Annotation Tool: This option will allow the pointer to be used.
•![]() Draw a Line: This option will allow a line to be drawn on the document.
Draw a Line: This option will allow a line to be drawn on the document.
•![]() Draw an Ellipse: This option will allow a circle to be drawn on the document.
Draw an Ellipse: This option will allow a circle to be drawn on the document.
•![]() Draw a Rectangle: This option will allow a rectangle to be drawn on the document.
Draw a Rectangle: This option will allow a rectangle to be drawn on the document.
•![]() Draw an Arrow: This option will allow an arrow to be drawn on the document.
Draw an Arrow: This option will allow an arrow to be drawn on the document.
•![]() Draw Text: This option will allow a text box to be on the document.
Draw Text: This option will allow a text box to be on the document.
•![]() Draw Freehand: This option will allow anything to be written or drawn on the document.
Draw Freehand: This option will allow anything to be written or drawn on the document.
•![]() Add a Note: This will allow a sticky note to be added to the document.
Add a Note: This will allow a sticky note to be added to the document.
•![]() Highlight Area: This will allow areas in the document to be highlighted.
Highlight Area: This will allow areas in the document to be highlighted.
•![]() Select Item: This will allow an item in the document to be selected.
Select Item: This will allow an item in the document to be selected.
•![]() Save: This will allow changes to be saved without exiting the document.
Save: This will allow changes to be saved without exiting the document.
•![]() Save Current Image: This will allow the document that is showing to be saved to a folder on the PC.
Save Current Image: This will allow the document that is showing to be saved to a folder on the PC.
•![]() Save Document: This option will allow the entire document to be saved to a folder on the PC.
Save Document: This option will allow the entire document to be saved to a folder on the PC.
•![]() Assign to Document Type: This option will allow certain pages of the document to be assigned/saved to specific folders.
Assign to Document Type: This option will allow certain pages of the document to be assigned/saved to specific folders.
•![]() Copy: This will allow the document to be copied.
Copy: This will allow the document to be copied.
•![]() Paste: This will allow the document to be pasted in another location.
Paste: This will allow the document to be pasted in another location.
•![]() Print: This will allow the document to be printed.
Print: This will allow the document to be printed.
•![]() Acquire from Scanner: Allows the images to be uploaded from a scanner into the Batch Scanning application.
Acquire from Scanner: Allows the images to be uploaded from a scanner into the Batch Scanning application.
•![]() Acquire from Camera: This will allow images to be uploaded from a camera into the Batch Scanning application.
Acquire from Camera: This will allow images to be uploaded from a camera into the Batch Scanning application.
•![]() Previous: This option will view the previous document.
Previous: This option will view the previous document.
•![]() Next: This option will view the next document within the batch.
Next: This option will view the next document within the batch.
•![]() First: This option will view the first page of the batch.
First: This option will view the first page of the batch.
•![]() Last: This option will view the last page of the batch.
Last: This option will view the last page of the batch.
•![]() Delete Image: This option will allow the document showing to be deleted.
Delete Image: This option will allow the document showing to be deleted.
•![]() Delete All: This option will allow the entire batch of documents to be deleted.
Delete All: This option will allow the entire batch of documents to be deleted.
•![]() Rotate Left: This option will allow the document to be turned to the left for viewing.
Rotate Left: This option will allow the document to be turned to the left for viewing.
•![]() Rotate Right: This option will allow the document to be turned to the right for viewing.
Rotate Right: This option will allow the document to be turned to the right for viewing.
•![]() Enlarge: This option will allow the document to view larger.
Enlarge: This option will allow the document to view larger.
•![]() Reduce: This option will allow the document to view smaller.
Reduce: This option will allow the document to view smaller.
•![]() Barcode: This option will allow a barcode sheet to be printed. This barcode sheet is used before batch scanning in order to group documents together.
Barcode: This option will allow a barcode sheet to be printed. This barcode sheet is used before batch scanning in order to group documents together.
•![]() About: This will display the cpBatchScan Version.
About: This will display the cpBatchScan Version.
After editing the image, select the ![]() Save Current Images icon, to save the current image(s) or select
Save Current Images icon, to save the current image(s) or select ![]() Save Document, to save the entire document.
Save Document, to save the entire document.