|
<< Click to Display Table of Contents >> Appointment Request via Web |
  
|
|
<< Click to Display Table of Contents >> Appointment Request via Web |
|
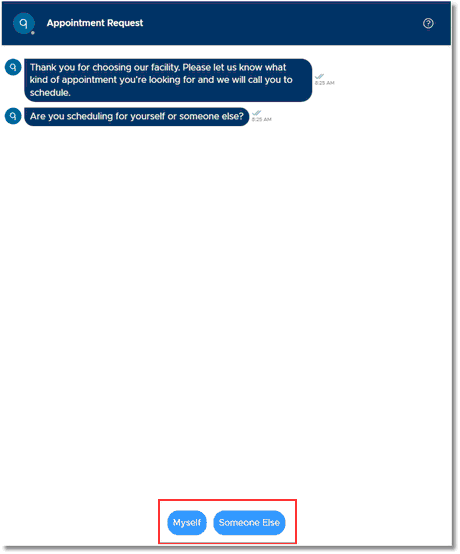
Patients requesting an appointment via a web link will answer responses on the screen as options are selected.
Once a link is initially selected, the user will have the option to request an appointment for themselves or for someone else at the bottom of the screen.
Appointment Request
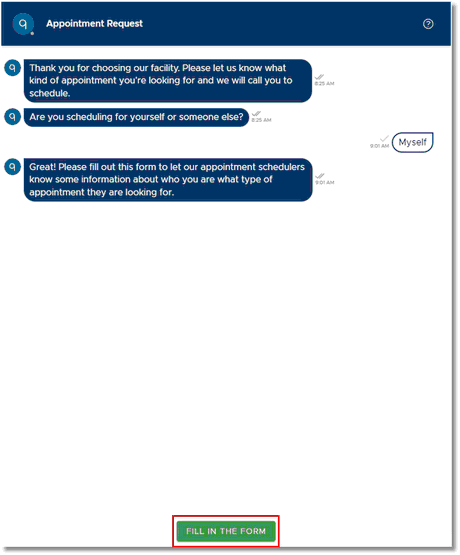
Once Myself or Someone Else has been selected, users will select Fill in the Form at the bottom of the screen. This will direct the user to a new page to fill out general information about the appointment being requested.
Appointment Request
The following screen will appear. The user must complete all fields with an asterisk.
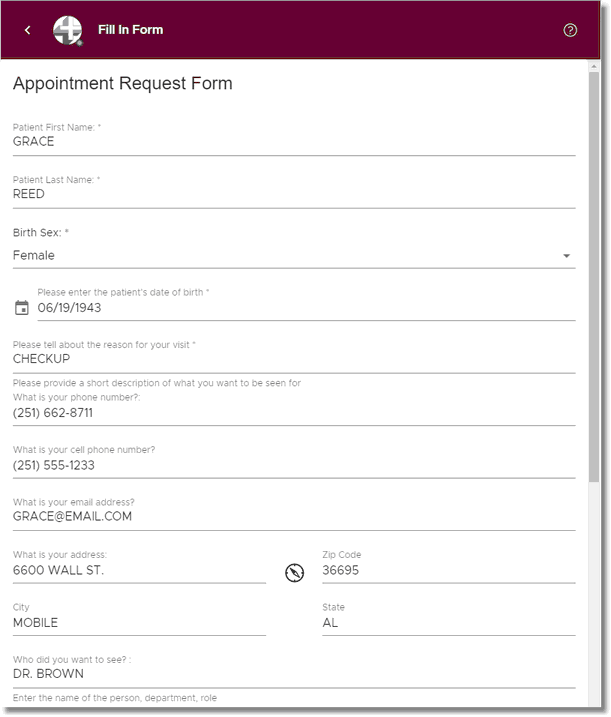
Fill In Form
Below is an explanation of each field:
•Patient Last Name: Patient will enter their last name. This is a required field.
•Patient First Name: Patient will enter their first name. This is a required field.
•Birth Sex: One of the following must be selected: Male, Female or Prefer Not to Answer.
•Please enter the patient's date of birth: Patient will select anywhere within the field to first select a year. Then the patient will select the month and day. This is a required field.
•Please tell about the reason for your visit: Patient will briefly type a reason for why an appointment is being requested. This is a required field.
•What is your phone number?: Patient will enter a phone number, if applicable.
•What is your cell phone number?: Patient will enter a cell phone number, if applicable.
•What is your email address?: Patient will enter an email address, if applicable.
•What is your address: Patient will enter their street address.
•Zip Code: Patient will enter their zip code.
•City: Patient will enter their city.
•State: Patient will enter their state.
•Who do you want to see?: Patient will type the name of the person, department or role they wish to see.
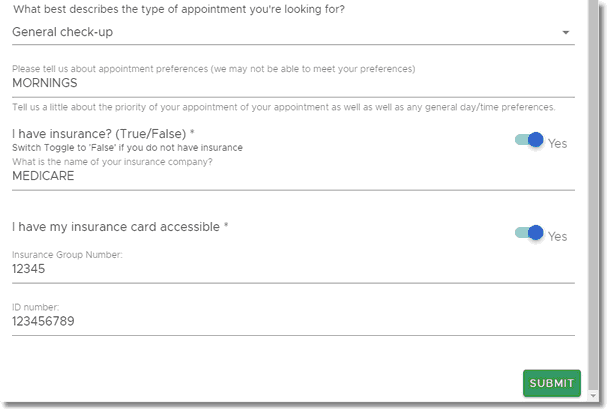
•What best describes the type of appointment you're looking for?: Patient will select the drop-down to select the type of appointment being requested. This list may be customized per facility.
•Please tell us about appointment preferences (we may not be able to meet your preferences).: Patient may explain a little about the priority of the appointment as well as any general day/time preferences.
•I have insurance? (True/False): This field will default to True (aka Yes). The toggle may be switched to False (aka No) if the patient does not have insurance. This is a required field.
•What is the name of your insurance company?: If "I have insurance" is set to Yes, the patient must enter the name of the insurance company. This is a required field.
•I have my insurance card accessible: If "I have insurance" is set to Yes, this field will be enabled and will default to Yes. If the patient does not have access to their insurance card, they may switch the toggle to No. This is a required field.
•Insurance Group Number: The patient may enter the insurance group number listed on the insurance card.
•ID number: The patient may enter the insurance ID/Policy number listed on the insurance card.
Once all required fields have been populated, select Submit at the bottom of the screen.
The user will then return to the Appointment Request screen confirming the request is complete and someone from the facility will be in touch with them soon.
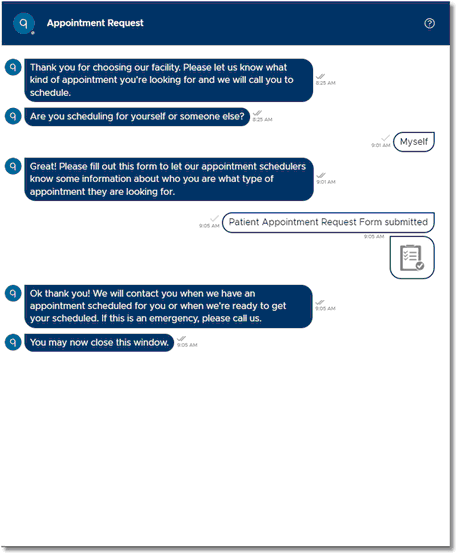
Appointment Request
To complete a requested appointment, please refer to the Unscheduled Appointments section of this documentation.