|
<< Click to Display Table of Contents >> Sending a New Message |
  
|
|
<< Click to Display Table of Contents >> Sending a New Message |
|
To begin sending a new message, first select a facility from the Facility drop-down and then select ![]() New Message.
New Message.
Select ![]() Send To to select the patients that will receive the message.
Send To to select the patients that will receive the message.
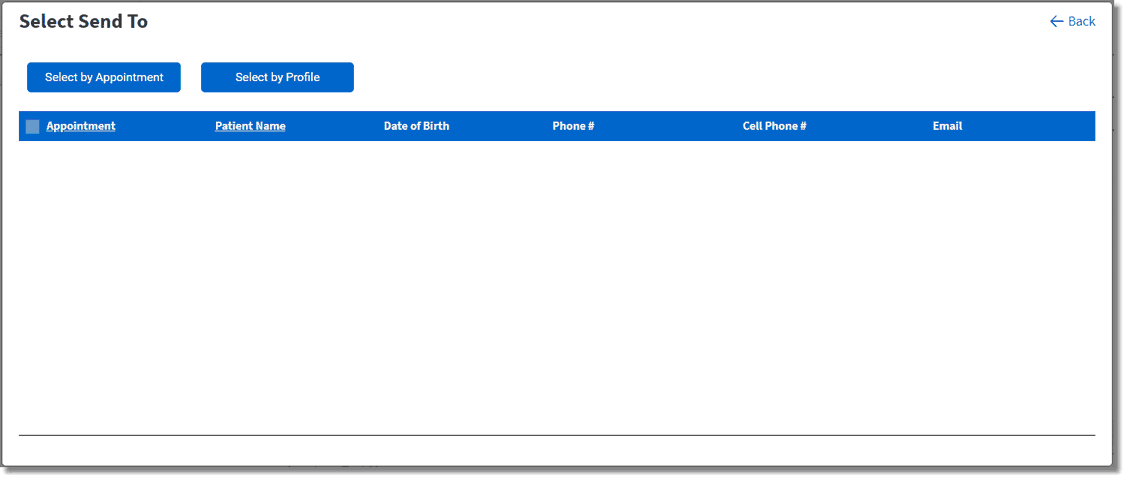
Select Send To
Select by Appointment
![]() Select by Appointment may be selected to send the message based on the type of appointments that are scheduled.
Select by Appointment may be selected to send the message based on the type of appointments that are scheduled.
Once selected, filters are available to narrow down the types of appointments the message will be sent to. If any filters are selected, select ![]() Search to display the results. Select all applicable patients and then choose
Search to display the results. Select all applicable patients and then choose ![]() Select.
Select.
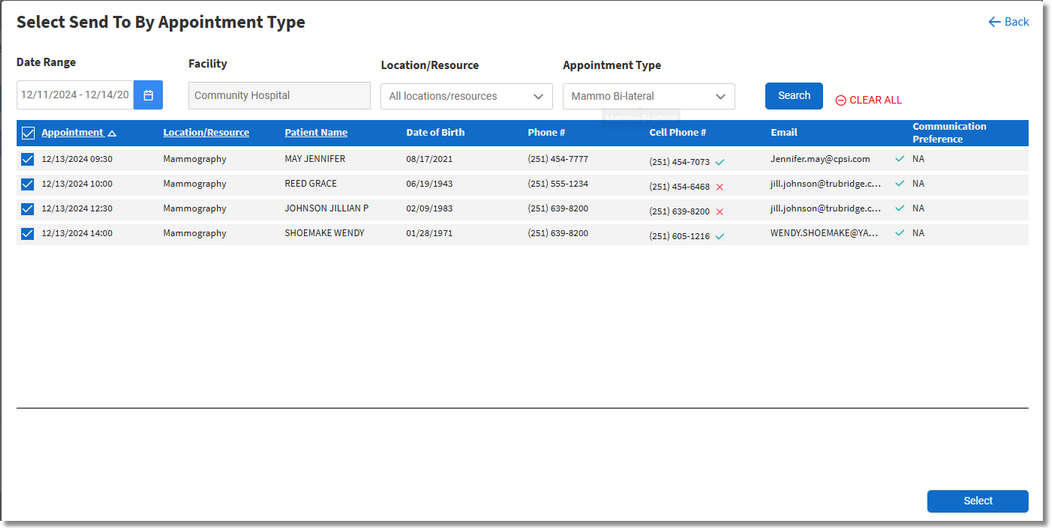
Select Send To By Appointment Type
Select by Profile
![]() Select by Profile may be selected to send the message to specific profiles, even if the patient does not have an appointment.
Select by Profile may be selected to send the message to specific profiles, even if the patient does not have an appointment.
Once selected, a Search option is available to search for profiles by name, date of birth or phone number. If information is entered into the Search field, select ![]() Search to display the results. Select all applicable patients and then choose
Search to display the results. Select all applicable patients and then choose ![]() Select.
Select.
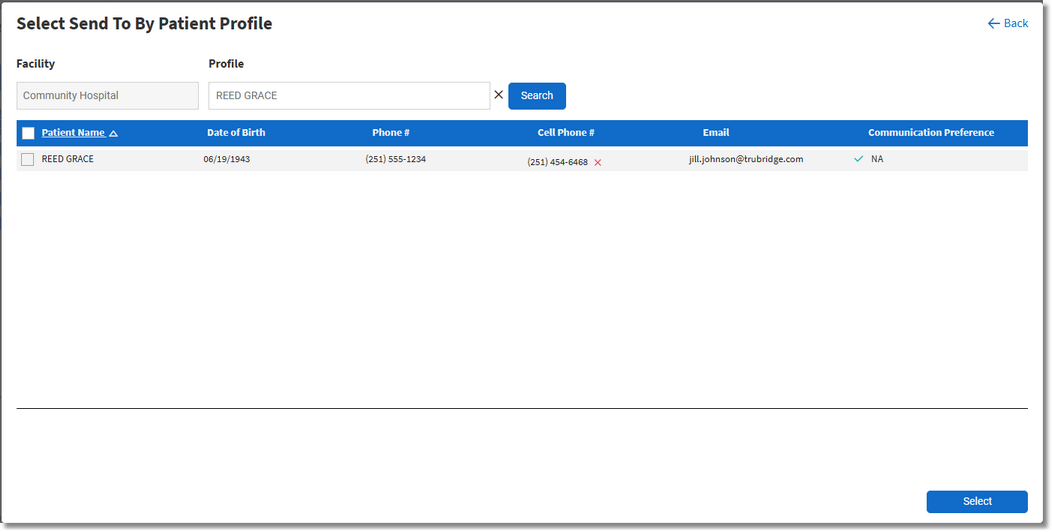
Select Send To By Patient Profile
Select by Worklist
![]() Select by Worklist may be selected to send the message to patient's that are on the Worklist.
Select by Worklist may be selected to send the message to patient's that are on the Worklist.
Once selected, a Search option is available to search for patients on the Worklist by expected date, created on date, or admit date. After the Date Option has been selected, enter a date range and select ![]() Search to display the results. Select all applicable patients and then choose
Search to display the results. Select all applicable patients and then choose ![]() Select.
Select.
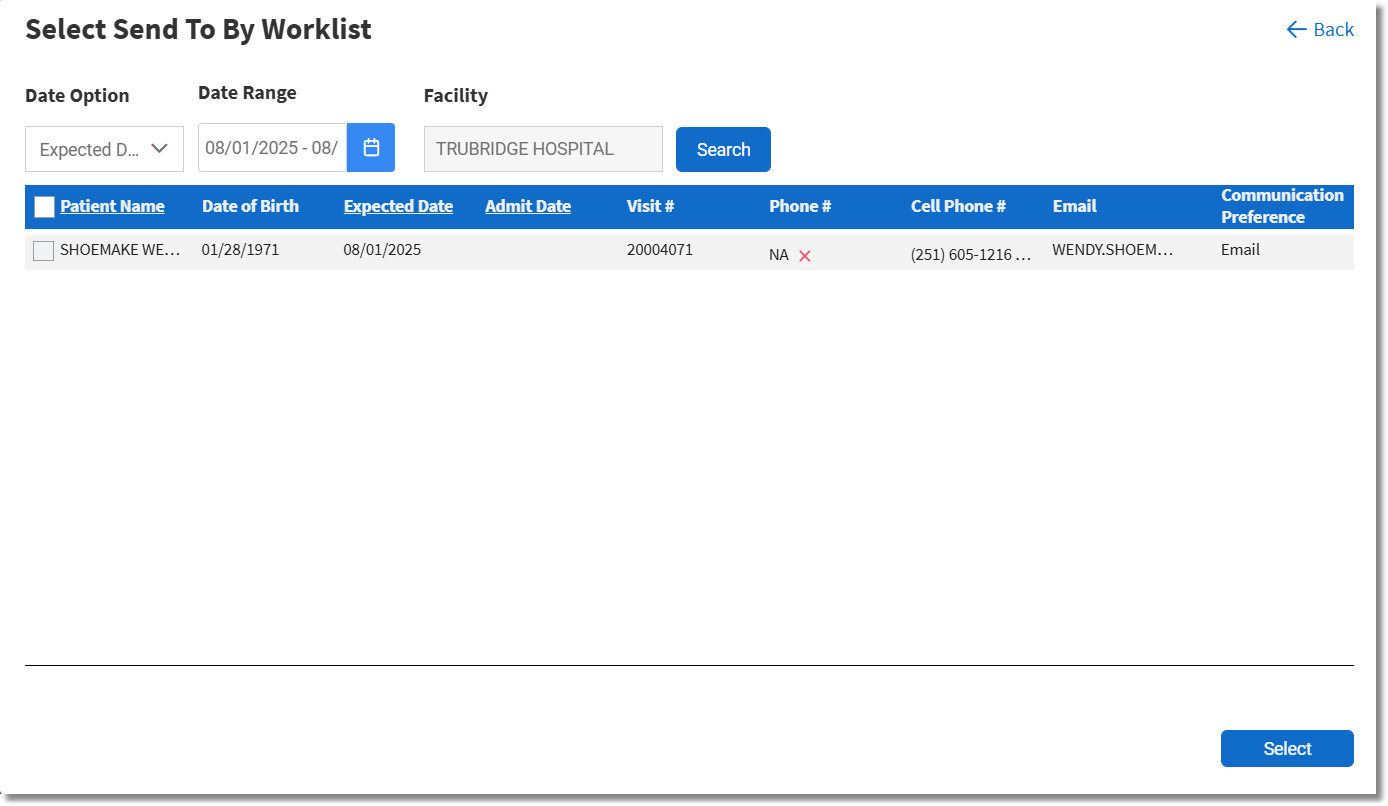
Select Send To By Worklist
Complete Sending Message
Select ![]() Complete once all Send To selections have been made. The screen will then return to the Create Message screen.
Complete once all Send To selections have been made. The screen will then return to the Create Message screen.
Enter a Subject that will appear in the subject line of the email being sent to patients.
Enter the Message that will be sent in the email and text message to the patients.
NOTE: <No Reply> is automatically added to the end of the message so that patients will not try to respond to the message being sent.
The Override opt in/out option may be selected to bypass the checking of the opt in/out status of the patient prior to sending the message.
A test message may be sent for review prior to sending to the selected list of patients. Simply enter a cell phone number and/or email address and select ![]() Send Test.
Send Test.
NOTE: Test messages are not tracked within Patient Connect.
After all information has been entered, select ![]() Send Message to send the message to all of the selected patients.
Send Message to send the message to all of the selected patients.