|
<< Click to Display Table of Contents >> PRN Administration Reasons |
  
|
|
<< Click to Display Table of Contents >> PRN Administration Reasons |
|
The PRN Administration Reasons table lists the PRN reasons that display for selection during order entry. PRN Reasons can be added, edited, and deleted in this table.
Select Web Client > Tables > Clinical > Nursing category > PRN Administration Reasons
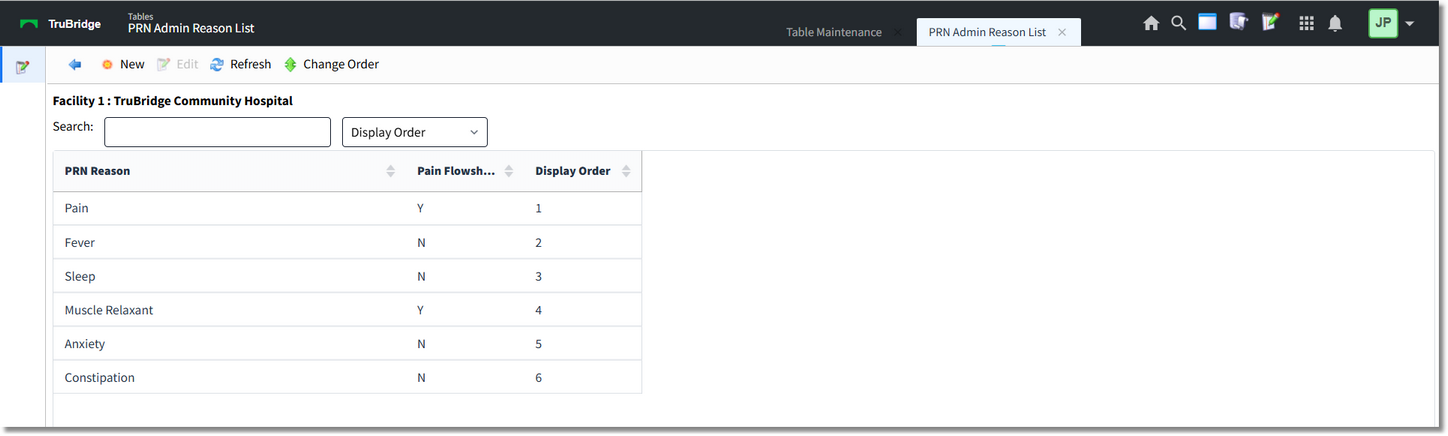
PRN Administration Reasons Table
The table displays the following information:
•PRN Reason: Displays the PRN reason.
•Pain Flowsheet: Displays a Y if the PRN reason is set to display on the Pain Flowsheet or N if the PRN reason is not set to display on the Pain Flowsheet.
•Display Order: Displays the numerical order in which the PRN reasons will display for selection.
A search may be performed by keying the search term in the Search field and selecting the appropriate search type from the drop-down. The table may also be sorted by selecting a column header.
Action Bar Options
•Blue back arrow: Select to return to the previous screen.
•New: Select to create a new PRN reason.
•Edit: Select to edit the selected PRN reason.
•Refresh: Select to refresh the screen.
•Change Order: Select to change the display order of a PRN reason.
To Create a New PRN Reason
1.Select New.

PRN Admin Reason - New
2.In the PRN Reason field, enter the PRN reason. This field accepts up to 50 characters.
3.In the Pain Flowsheet field, select the drop-down and select Y to include the reason on the Pain Flowsheet or N to not include the reason on the Pain Flowsheet.
4.Select Save.
5.Select the blue back arrow to return to the PRN Admin Reason List.
6.Select Refresh to update the screen.
NOTE: "Other" will display as a hard-coded reason in the list.
To Edit a PRN Reason
1.Select the PRN reason you want to edit.
2.Select Edit.
3.Make the necessary changes and select Save.
4.Select the blue back arrow to return to the PRN Administration Reasons table.
5.Select Refresh to update the screen.
To Delete a PRN Reason
1.Select the PRN reason you want to delete.
2.Select Edit.
3.Select Delete.
4.Select Refresh to update the screen.
To Change the Display Order of the PRN Reasons
1.Select Change Order.
2.Select the PRN reason you want to move.
3.Select To Top, To Bottom, Up, or Down to move the reason to the desired order within the list.
4.Make any other necessary changes to the display order and select Save.