|
<< Click to Display Table of Contents >> Completing a Request for an Existing Patient |
  
|
|
<< Click to Display Table of Contents >> Completing a Request for an Existing Patient |
|
When Find a Match is selected and TruBridge EHR finds a potential match, it will list the potential patient profiles at the bottom of the screen. Be sure to verify the name and date of birth. Once the correct profile has been determined, select Match Profile to continue.
NOTE: A patient's preferred name may display in parentheses after the legal name.
This information pulls from Web Client > System Menu > Profile Listing > Select Profile > Misc Options > Additional Demographics. The preferred name will display if the patient's Last, First and Middle name are populated under Person's Alternate Name/Address and has selected Call Me as the Name Qualifier.
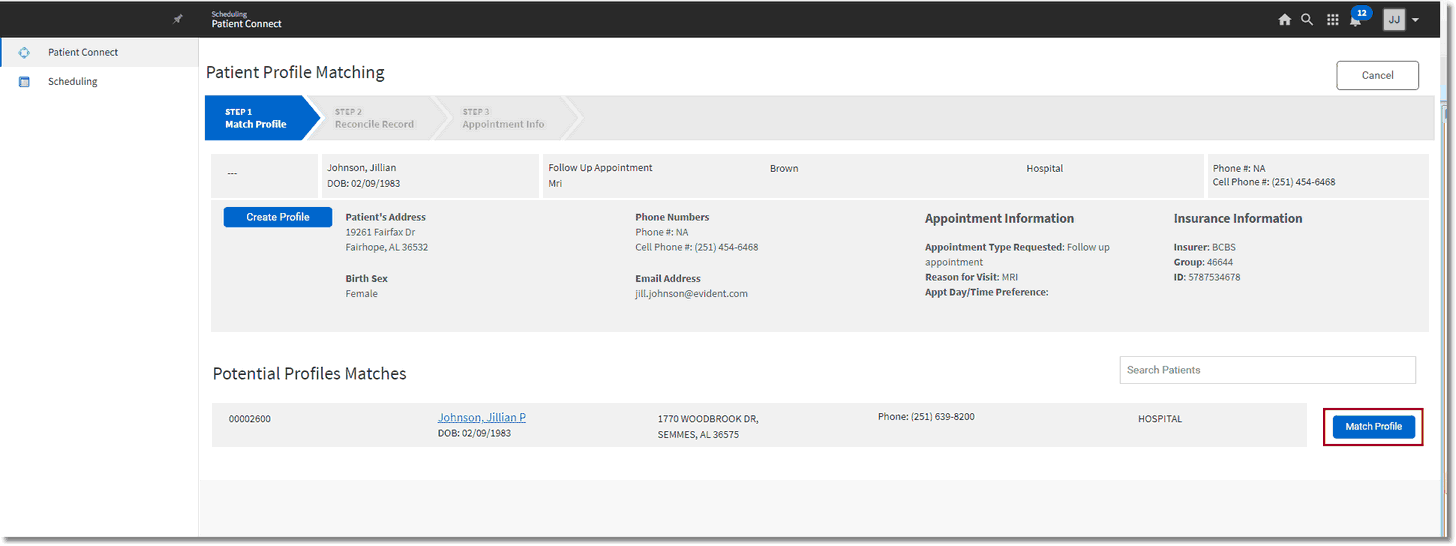
Patient Profile Matching
The patient's profile information will display along with their appointment request information entered on the appointment request. If the profile was selected incorrectly, select Back to return to the list of potential profiles to choose from.
If any changes need to be made to the demographics, select Edit before updating.
If the information submitted by the patient on the appointment request is different than what is on their profile, the information will be highlighted in orange with the word "Different" next to the field. Select Apply new information to update the patient's profile with the new information.
Select Keep existing information to keep the patient profile as is and continue with completing the request.
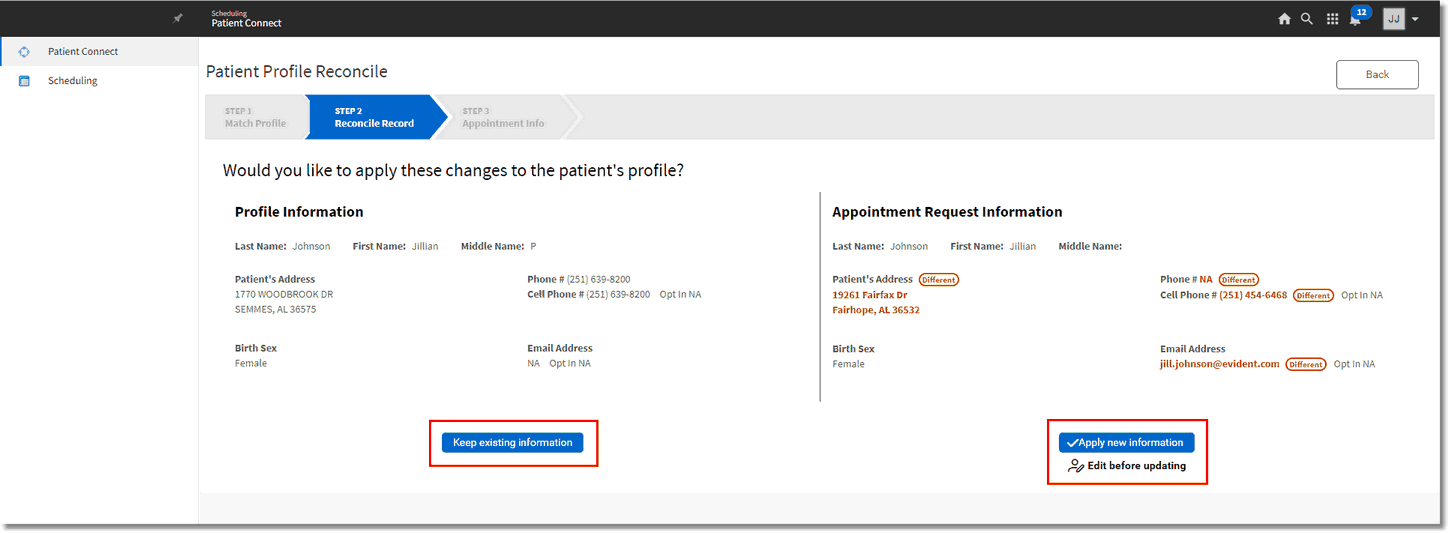
Patient Profile Reconcile
The last step will capture appointment information. Select the Location/Resource and the Appointment Task. The Reason for Visit will pull the patient's reason from the appointment request. Comments may also be added, if needed.
Select Send to Unscheduled or Schedule to complete the appointment request. If Send to Unscheduled is selected, the screen will return to the Unscheduled Appointments tab, where the appointment request will now be displayed. If Schedule is selected, the Schedule Appointment screen will display to immediately schedule the requested appointment. Please refer to the Scheduling Appointments section of this user guide for information on scheduling appointments.
NOTE: A warning message may display if a form image title has not been configured in the Configuration screen for storing the appointment request to Electronic File Management. The message will say, "Document name for storing the appointment request to EFM is not configured for this facility. Do you want to proceed?" If No is selected, the screen will return to the Appointment Type selection view. If Yes is selected, the screen will proceed to the Scheduled view, or the Unscheduled tab, and a form will be created with no description in Electronic File Management.
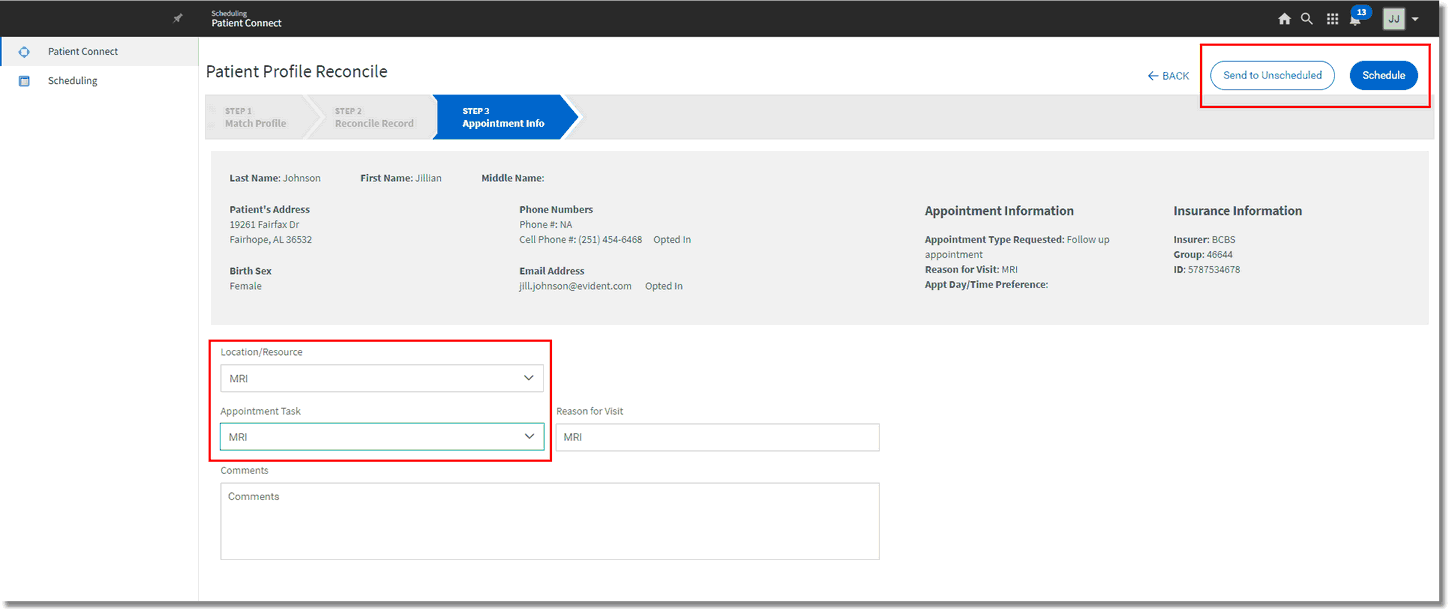
Patient Profile Reconcile