|
<< Click to Display Table of Contents >> Completing a Request for New Patient |
  
|
|
<< Click to Display Table of Contents >> Completing a Request for New Patient |
|
Selecting Find a Match will search the patient profiles within the facility to find any potential matches for the patient requesting the appointment. Patient Connect will request a list of matching profiles from TruBridge EHR based on the name and date of birth submitted by the patient. If no potential matches are found, select Create Profile.
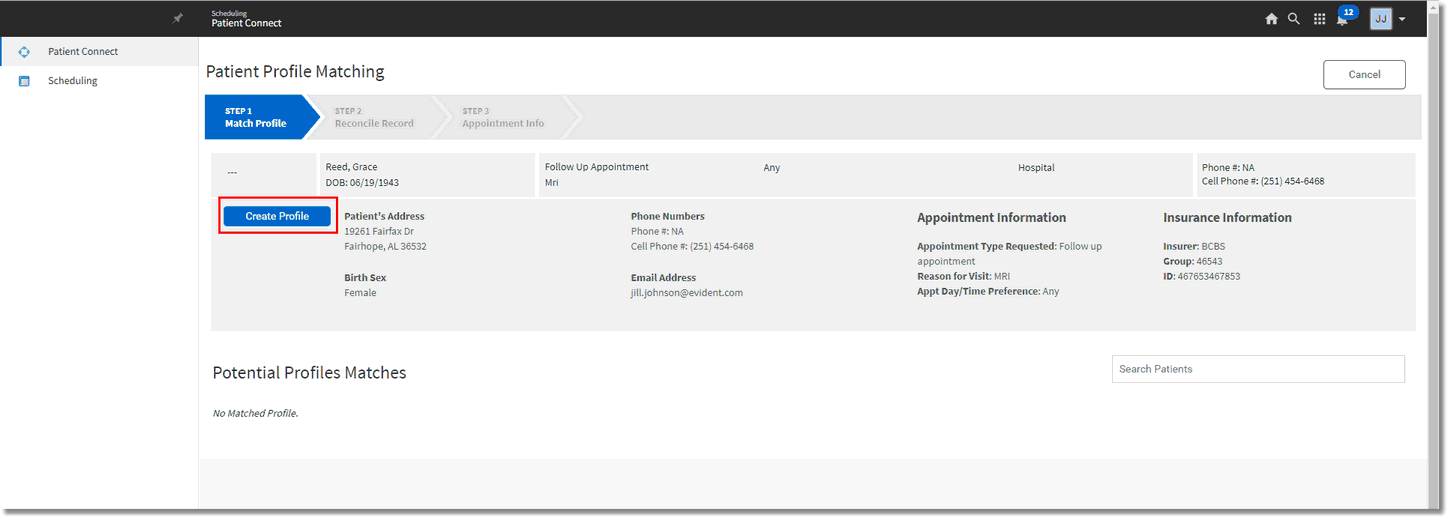
Patient Profile Matching
The Patient Profile creation screen will display all of the information the patient entered for their request. The patient's demographic information may be edited on this screen if needed. Once all information has been verified, select Create Profile.
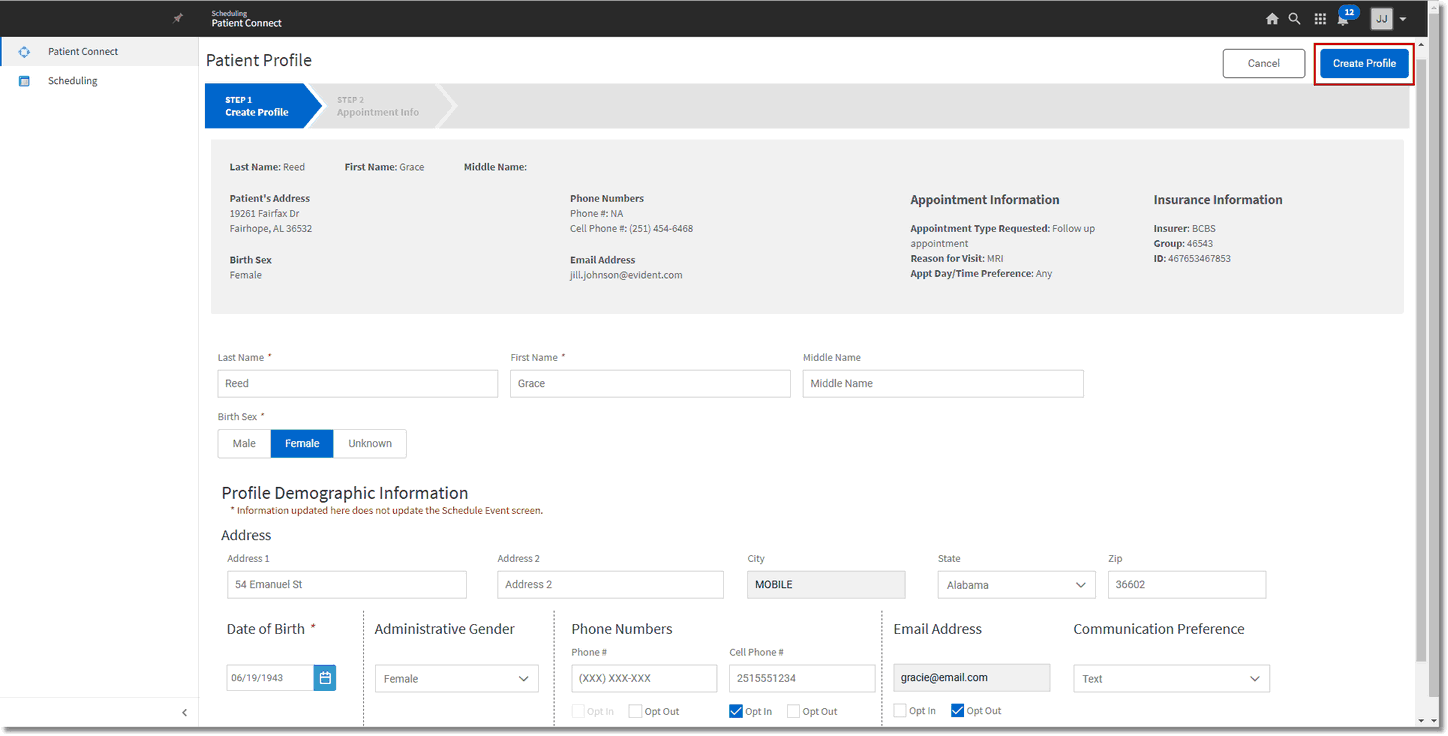
Create Profile
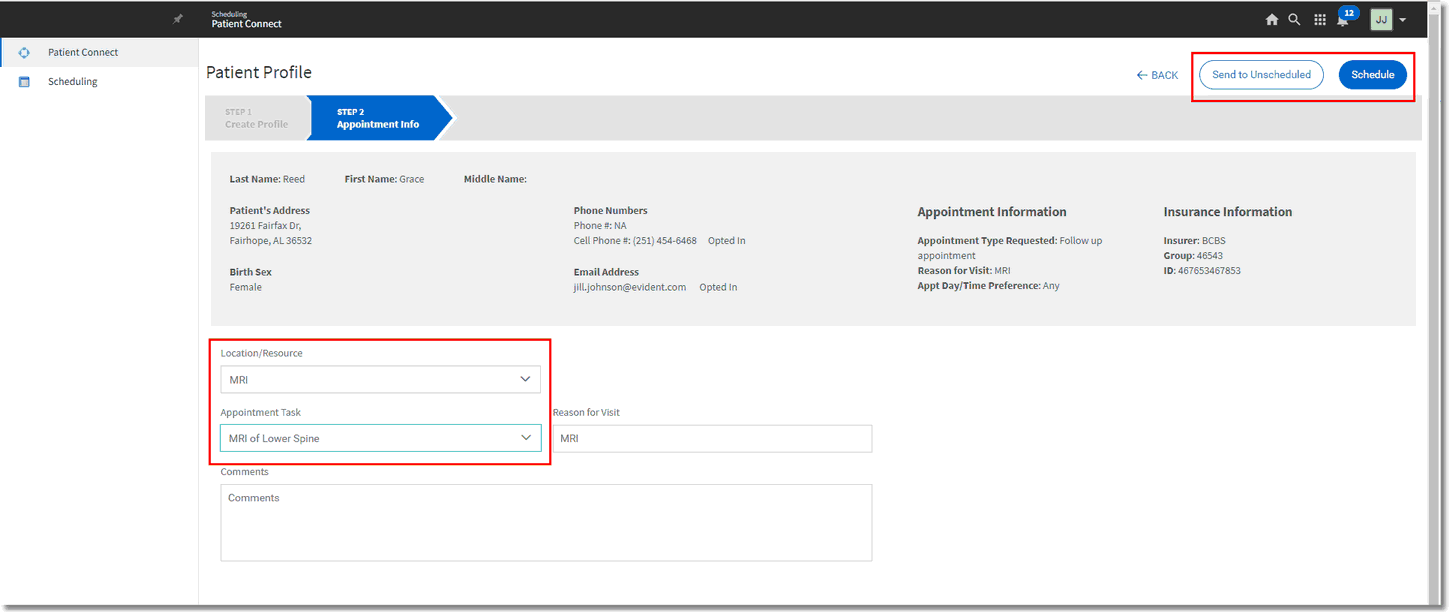
The next step will capture appointment information. Select the Location/Resource and the Appointment Task. The Reason for Visit will pull the patient's reason from the appointment request. Comments may also be added, if needed.
Select Send to Unscheduled or Schedule to complete the appointment request. If Send to Unscheduled is selected, the screen will return to the Unscheduled Appointments tab, where the appointment request will now be displayed. If Schedule is selected, the Schedule Appointment screen will display to immediately schedule the requested appointment. Please refer to the Scheduling Appointments section of this user guide for information on scheduling appointments.
NOTE: A warning message may display if a form image title has not been configured in the Configuration screen for storing the appointment request to Electronic File Management. The message will say, "Document name for storing the appointment request to EFM is not configured for this facility. Do you want to proceed?" If No is selected, the screen will return to the Appointment Type selection view. If Yes is selected, the screen will proceed to the Scheduled view, or the Unscheduled tab, and a form will be created with no description in Electronic File Management.
Appointment Info