|
<< Click to Display Table of Contents >> Viewing Forms |
  
|
|
<< Click to Display Table of Contents >> Viewing Forms |
|
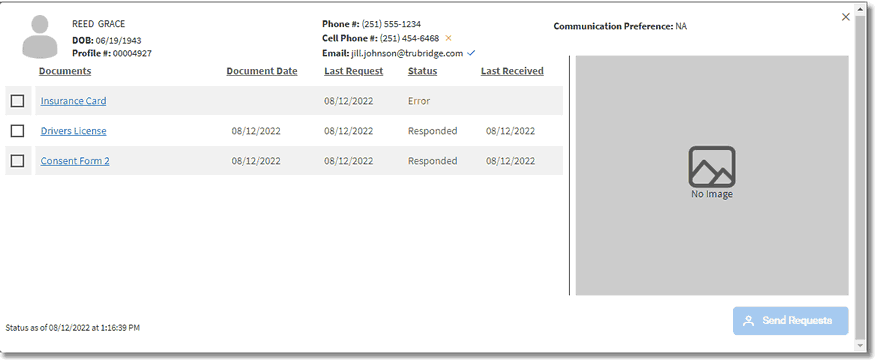
Once a patient has submitted forms, the Forms icon will display with either a blue dot, red dot and/or an orange dot next to it.
A blue dot will indicate the form(s) was successfully received, and hovering over the icon will display the requested forms in blue text along with the date they were received. Selecting a form name in blue text will display the form.
A red dot will indicate there was an error with submitting the form(s) and hovering over the icon will display those forms in red text along with the error. Selecting the form name with the error will display the error message.
An orange dot will indicate there is a pre-registration form that requires reconciliation. Please refer to the Pre-Registration Form section of this documentation for more information on how to reconcile.
The Scheduled Appointments tab may be filtered to display Forms Returned, Forms Not Received, as well as Forms With Error by selecting the Show drop-down at the top of the screen.
To view forms the patient has submitted, select the ![]() Forms icon.
Forms icon.
NOTE: Forms received from the patient will be placed in Electronic File Management. Facilities may specify the forms to upload to the Profile level or the Visit level in Bot Configurations. For more information on how to associate submitted forms from the profile to the correct patient visit, please see the Moving Forms section of this documentation.
The following columns will display:
•Form: The title of the form.
•Interval: This indicates if an automation track was invoked to automatically select documents needed and what the interval of how often it will need to be requested. This column will only display when Forms Automation has been enabled and the scheduled appointment meets the criteria of an automation track.
•Save To: Will display whether the form is stored at the Visit or the Profile level.
•Form Date: Will reflect the date the form was last updated in Electronic File Management.
•Last Request: Will reflect the date the form was requested from Patient Connect.
•Status: Will reflect the status of form requests. The statuses are as follows:
oSent: The form request has been sent via email and/or text.
oViewed: The patient has opened the form request link received via email and/or text.
oResponded: The form has been submitted by the patient. If the patient does not upload requested information (i.e. a driver's licenses) and still selects Submit on the form, a red X will appear next to Responded. Hovering over the red X will display the wording "Image Not Uploaded".
oError: This may display for one of the following reasons:
▪After receiving the form, an error occurred while posting the form to Electronic File Management.
▪There was an error prior to sending the form request to the patient.
▪If this error appears, select the form link to see the error.
•Last Received: Will reflect the date the form was last received from the patient, due to the Patient Connect request.
NOTE: Forms added directly to Electronic File Management will also display in the Forms tab.
If wanting to request a form again, select the appropriate checkbox in the Forms column and then select Send Requests.
Form Request
To view a form, select the form title from the Forms column. It will then display on the right side of the screen.
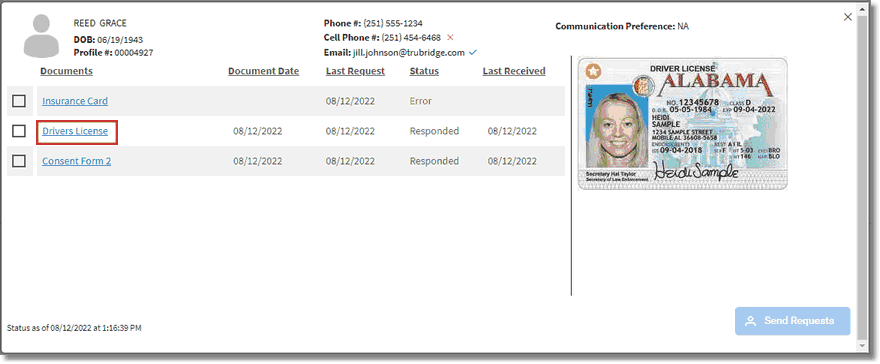
Form Request - View Form